
A client walked in last month with a $300 straight razor and a completely rounded edge — he’d been running it across a kitchen knife sharpener for weeks. Straight razors need a completely different approach than any other blade you own, and the wrong technique can ruin a good blade fast. Here’s exactly how to hone and strop yours so the edge stays sharp for months, not days.
Key Takeaways
- Straight razors require specialized honing stones (4000–8000 grit) — never use kitchen knife sharpeners or pull-through devices
- Strop before every shave (40–60 passes on leather) to keep the edge aligned and delay full honing by months
- Apply only the weight of two quarters when honing — too much pressure damages the bevel geometry
- Never lift the spine from the stone or strop during direction changes — this rounds the edge instantly
- A properly maintained straight razor only needs full honing every 3–6 months with regular stropping
Understanding Straight Razor Sharpening
Sharpening a straight razor requires understanding the delicate balance between removing metal and preserving the blade’s geometry.
The razor’s edge consists of two bevels meeting at an incredibly fine point, typically around 16-18 degrees total angle. This edge is much finer than a pocket knife, requiring specialized techniques and equipment. When sharpening, you’re not just making it sharp—you’re maintaining the precise angle that allows for comfortable shaving.
Think of the process in three stages: restoration (if needed), refinement, and finishing. Most regular maintenance involves only refinement and finishing, while damaged blades require starting from restoration. The key is knowing which stage your razor needs.
Let’s explore the essential equipment you’ll need to properly maintain your blade’s edge.
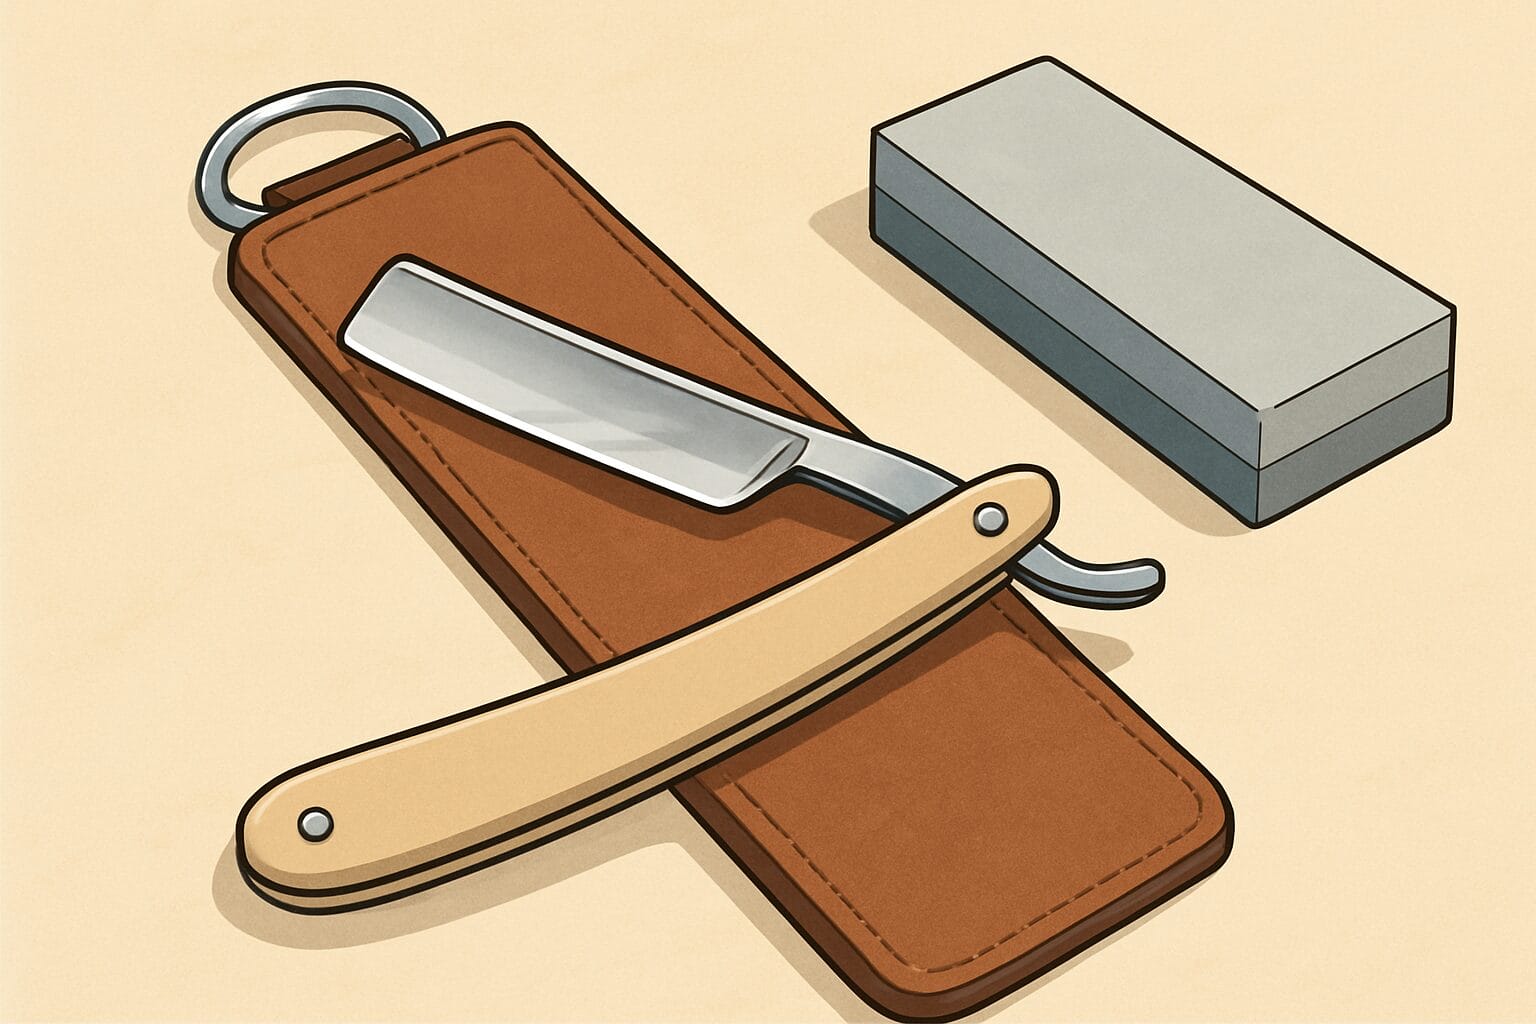
Essential Sharpening Equipment

Quality equipment makes the difference between a mediocre edge and one that glides through hair effortlessly.
You don’t need to invest thousands in equipment to start, but certain tools are non-negotiable. A basic setup includes at least two whetstones, a leather strop, and proper lubricants. Plan to spend $150-300 for quality starter equipment that will last years with proper care.
The most common mistake beginners make is trying to sharpen with kitchen knife stones or hardware store whetstones. Straight razors require specific stone types and grits that differ from other blade sharpening. Using the wrong equipment can permanently damage your razor’s edge geometry.
Understanding each tool’s purpose helps you build an effective sharpening kit.
Sharpening Stones
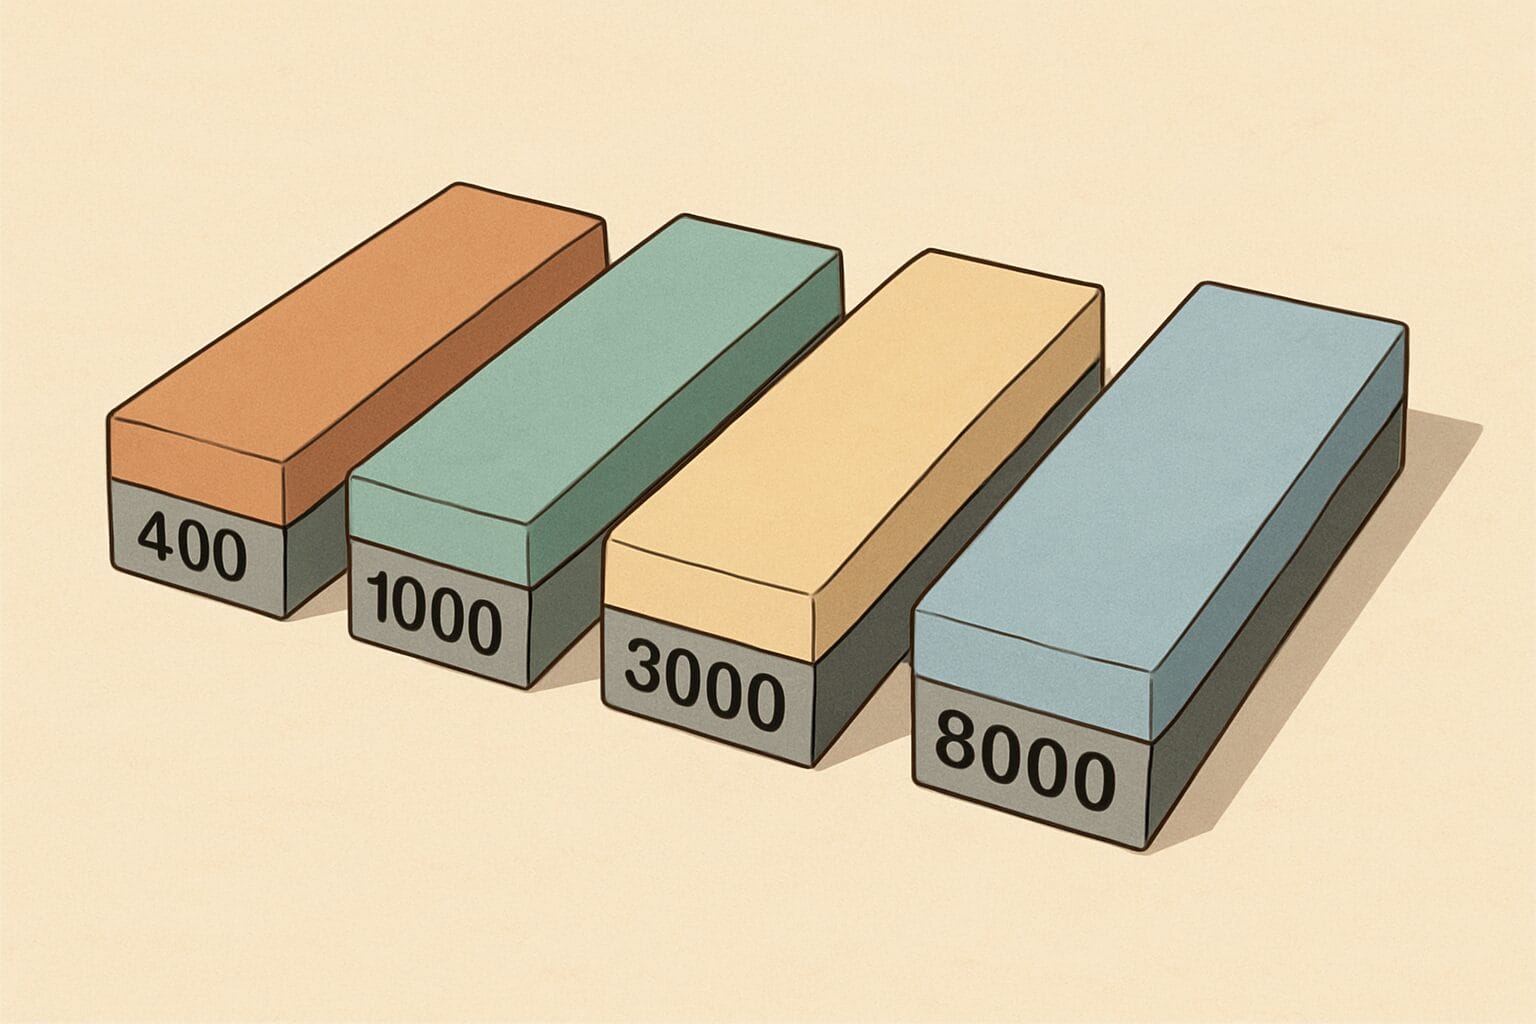
Whetstones for straight razors typically range from 1000 to 12000 grit, with most sharpening happening between 4000 and 8000. Natural stones like Japanese water stones or Belgian coticules are traditional favorites among professionals.
For beginners, I recommend starting with a 4000/8000 combination stone, which handles most sharpening needs. Add a 1000 grit stone only if you encounter chips or significant dullness. The 4000 grit shapes the edge while the 8000 refines it to shaving sharpness.
Strops and Compounds

A quality leather strop is arguably more important than your stones for daily maintenance. Look for Russian or English bridle leather at least 2.5 inches wide and 20 inches long. The smooth side does most of the work.
Chromium oxide or diamond paste compounds enhance stropping effectiveness, especially for touch-ups between honing sessions. Apply compounds sparingly to the rough side of your strop or a dedicated balsa wood paddle. Remember, less is more with these abrasives.
Preparing Your Straight Razor

Proper preparation prevents problems during sharpening and ensures consistent results every time.
Before touching stone to steel, you need to assess what you’re working with. A razor that’s been properly maintained needs different treatment than one found at an antique shop. Taking time to prepare saves hours of frustration and potentially saves your razor from damage.
In my experience, half of all sharpening problems stem from inadequate preparation. Rushing this stage often means starting over later when you realize the blade wasn’t clean or you misjudged the edge condition.
These preparation steps set the foundation for successful sharpening.
Inspection and Assessment

Hold your razor under bright light and examine the edge carefully, looking for chips, rust, or uneven wear. Use a jeweler’s loupe or magnifying glass if available to spot micro-chips invisible to the naked eye.
Test the current sharpness by carefully attempting to shave a single arm hair held away from skin. If it catches and cuts cleanly, you might only need stropping. If it slides off or tugs, honing is necessary.
Cleaning Before Sharpening

Remove all soap scum, skin cells, and oxidation using isopropyl alcohol and a soft cloth. Pay special attention to the pivot area and scales where debris accumulates. Never use abrasive cleaners that could scratch the blade.
For stubborn residue, apply metal polish with a cotton swab, working carefully to avoid the edge. Rinse thoroughly with alcohol afterward to remove all polish residue. Any contamination left on the blade will transfer to your stones.
The Honing Process

Honing transforms a dull blade into a shaving-ready instrument through progressive refinement.
The actual honing requires patience, consistency, and proper technique. Most razors need 40-100 passes per stone depending on condition. Count your strokes and maintain even pressure throughout—muscle memory develops with practice but starts with conscious repetition.
Water management matters as much as technique. Keep your stones wet but not flooded, refreshing the water every 20-30 strokes. The slurry that develops contains metal particles that aid cutting, so don’t rinse it away too frequently.
Master these fundamental techniques for consistent sharpening results.
Setting the Bevel

Lay the razor flat on your coarsest stone with the spine and edge touching simultaneously. This automatically sets the correct angle—never lift the spine. The blade should move spine-leading in smooth, even strokes.
Apply only enough pressure to keep full contact, about the weight of two quarters. Make 20 strokes on one side, then flip using a rolling motion keeping the edge away from the stone. Repeat until the edge reflects light evenly along its entire length.
Progressive Grit Refinement

Move to your 4000 grit stone once the bevel is set, using the same spine-on-stone technique. Reduce pressure slightly—imagine the weight of a single quarter now. The goal shifts from shaping to polishing.
Progress through each grit with 30-40 strokes per side, checking sharpness between stones. You should feel increasing smoothness as you move to finer grits. If the razor doesn’t improve, return to the previous grit rather than adding more strokes.
💡 Pro Tip
Use consistent pressure and count your strokes to develop muscle memory faster. I mark every 10 strokes on paper, ensuring equal attention to both sides.
This systematic approach eliminates guesswork and produces predictable results. After 20 razors, you’ll naturally feel when the edge is ready without counting.
Spine Taping: Should You Tape Your Razor?
One of the most debated topics in straight razor maintenance is whether to apply electrical tape to the spine during honing. The tape creates a thin barrier between the spine and the stone, preventing wear marks — but it slightly changes the bevel angle.
I only recommend taping for decorative or rare vintage razors where preserving the spine’s appearance matters. For everyday shavers, the spine wear from honing is minimal and actually helps maintain the correct bevel angle over the razor’s lifetime. If you’re shaving with a cut throat razor regularly, edge performance matters more than cosmetic spine condition.
If you do tape, use a single layer of electrical tape on each side. More than one layer changes the angle too much and produces an edge that looks sharp but doesn’t shave well.
Stropping for Final Edge

Stropping aligns the microscopic edge and removes any remaining burr from honing.
Think of stropping as the finishing touch that transforms a sharp razor into one that shaves comfortably. While honing happens monthly or less, stropping should happen before every shave. This daily maintenance extends the time between honing sessions significantly.
The leather’s gentle action realigns the steel without removing material like stones do. This preserves your razor’s lifespan while maintaining peak performance. Proper stropping can keep a well-honed razor sharp for 6-12 months of daily use.
Perfecting your stropping technique is essential for maintaining that fresh-honed feeling.
Leather Strop Technique
Hold the strop taut at shoulder height, keeping it perfectly flat without sagging. Place the razor spine-first on the leather, then rotate until the edge barely touches. The spine never leaves the strop during direction changes.
Pull the razor toward you with minimal pressure—just enough to maintain contact. At the end, roll on the spine to reverse direction. Complete 40-60 round trips before each shave, developing a steady rhythm rather than rushing.
⚠️ Common Mistake
Rolling the edge by lifting the spine during direction changes destroys all your honing work instantly. This creates a rounded edge that won’t shave no matter how sharp the steel is.
Always roll on the spine with the edge facing away from the strop. If you accidentally roll the edge, you’ll need to return to your finest stone to restore it.
Troubleshooting Common Honing Problems
Even experienced shavers run into problems during honing. Here are the issues I see most often when clients bring in razors they’ve tried to sharpen themselves.
Edge won’t improve after 50+ strokes: You’re likely applying too much pressure or the stone is glazed. Flatten your stone with a lapping plate and reduce pressure to barely-there contact. If the issue persists, drop down one grit level and rebuild from there.
Uneven sharpness along the blade: This usually means the razor isn’t sitting flat during strokes. Check for a warped blade by laying it on a flat surface — light shouldn’t pass under the edge. Smiling blades (curved edges) need a rocking motion during honing that follows the curve.
Razor shaves but tugs: The edge is sharp enough to cut but too rough for comfort. You need more time on your finishing stone (8000+ grit) or additional stropping. If you’re considering switching to a safety razor because of discomfort, the problem is almost always incomplete finishing — not the razor type.
Testing Your Razor’s Sharpness

Multiple testing methods confirm when your razor achieves optimal sharpness for comfortable shaving.
The hanging hair test remains the gold standard—a properly sharpened razor should cleanly slice a hair held loosely between your fingers. Hold the hair about an inch from the end and bring the razor edge to it slowly. It should pop through with minimal pressure.
For a more practical test, try shaving a small patch on your forearm with just water. The razor should remove hair smoothly without tugging or skipping. If it pulls or requires multiple passes, continue refining on your highest grit stone followed by additional stropping.
Now let’s discuss maintaining this sharp edge between honing sessions.
Maintenance Between Sharpenings

Daily care extends the intervals between honing sessions while ensuring consistently comfortable shaves.
After each shave, rinse your razor with hot water, then cold to close the steel’s pores. Pat dry completely with a soft towel—never rub the edge. Apply a thin coat of mineral oil or camellia oil to prevent oxidation, especially in humid climates.
Store your razor in a dry location with good airflow, avoiding bathroom cabinets where moisture accumulates. A simple razor stand or case works perfectly.
Strop before each use rather than after to avoid stropping moisture into the leather. This routine takes under 5 minutes but adds months between honing needs.
Ready to Find Your Perfect Cut?
You’ve read about the styles. Now find the one that fits YOUR face shape, hair type, and lifestyle.
🎬 How to sharpen straight razor? How to hone straight razor?
FAQs
How often should I sharpen my straight razor?
With proper stropping, most razors need honing every 3-6 months of regular use. Your shaving frequency, beard coarseness, and stropping technique all affect this timeline. When stropping no longer restores comfortable shaving after 80-100 passes, it’s time to return to the stones.
What grit stones do I need to start?
A 4000/8000 combination waterstone handles 90% of sharpening needs for maintained razors. Add a 1000 grit only if you’re restoring vintage razors or fixing chips. Later, consider a 12000 grit finishing stone or natural finisher like a coticule for enhanced comfort.
Can I sharpen a damaged or chipped blade?
Minor chips under 1mm can be honed out starting with 1000 grit, though you’ll remove significant steel. Larger damage requires professional restoration or might render the razor unserviceable. Cracks near the edge are usually fatal flaws—don’t risk injury trying to salvage severely damaged blades.
What is the difference between honing and stropping a straight razor?
Honing removes steel from the blade using abrasive stones to reshape and sharpen the edge — you typically do this every 3–6 months. Stropping polishes and realigns the existing edge using leather without removing metal — you do this before every shave. Think of honing as sharpening a dull pencil with a sharpener, while stropping is like straightening a bent pencil tip. Most of your maintenance time goes into stropping, with honing reserved for when stropping alone can’t restore comfortable shaving.
Can you sharpen a straight razor with a knife sharpener?
No — kitchen knife sharpeners, pull-through sharpeners, and electric sharpeners will destroy a straight razor’s edge. These tools remove too much metal at the wrong angle. Kitchen knives use 15–20 degrees per side, while straight razors need the ultra-fine angle set by the spine touching the stone (about 16–18 degrees total). Always use proper whetstones designed for razor honing, starting at 4000 grit and finishing at 8000 or higher.
Was this article helpful?

Khamis Maiouf is a professional barber who graduated from Hinckley College in England with a Level 3 qualification in hairdressing. With over 20 years of experience, he is an award-winning barber who has mentored numerous students and styled thousands of clients. A recognised expert featured on StyleCraze (20M+ readers).
Credentials: Level 3 Hairdressing (Hinckley College, UK) • 20+ Years Professional Experience • Featured Expert on StyleCraze • Founder of Book of Barbering