✓ Written & Reviewed by Khamis Maiouf — Award-Winning Barber · 20+ Years Experience · Level 3 Qualified
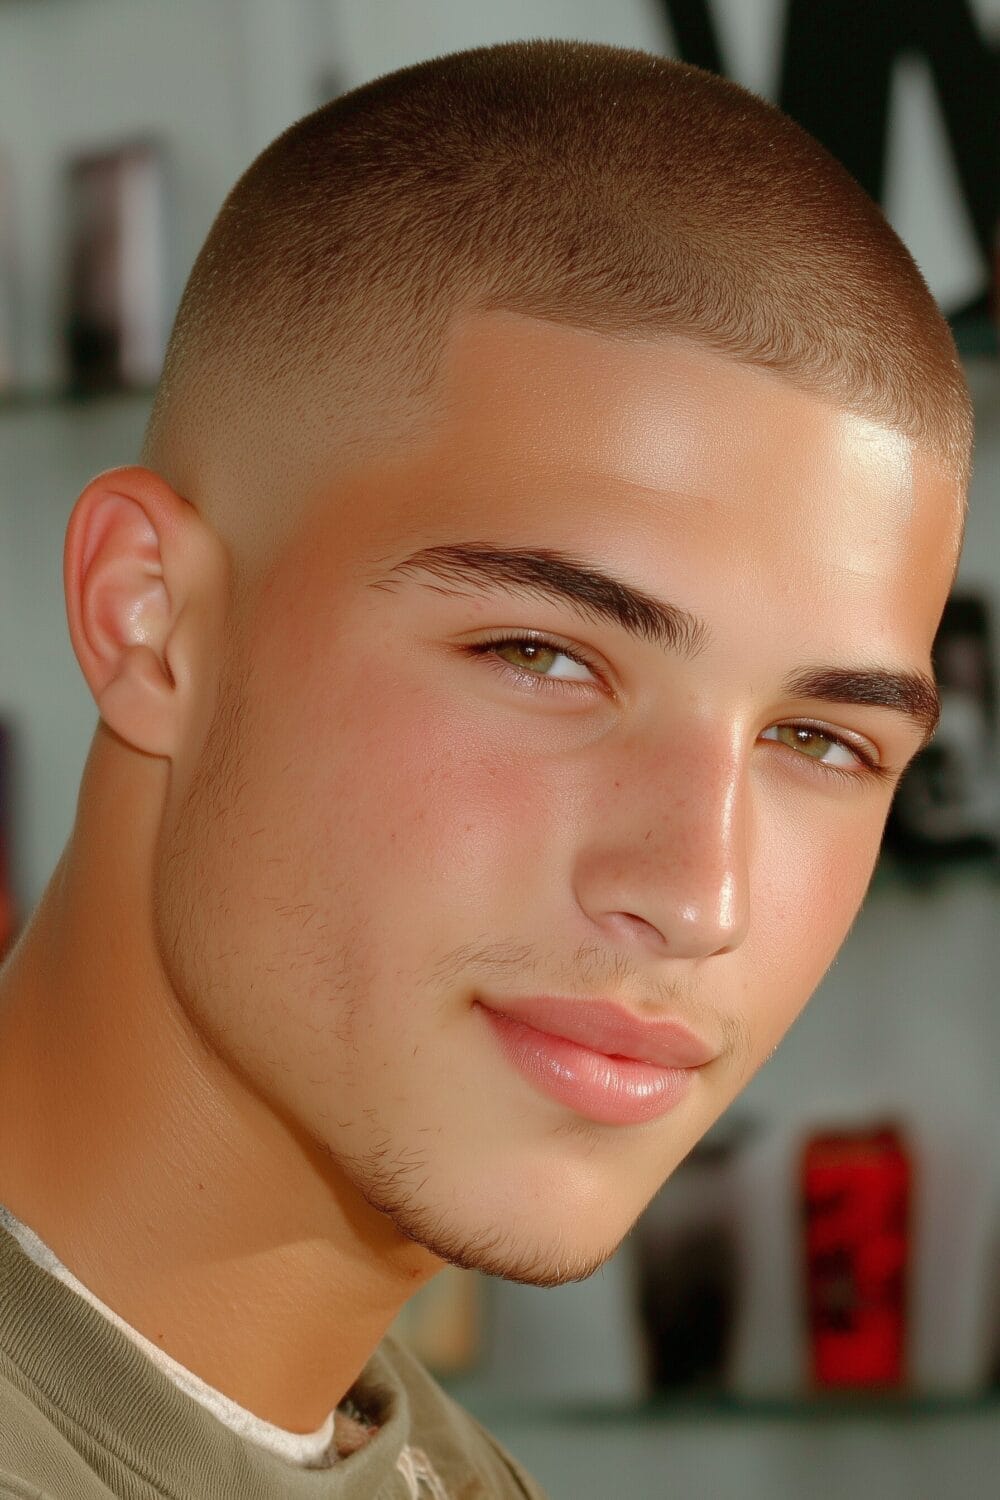
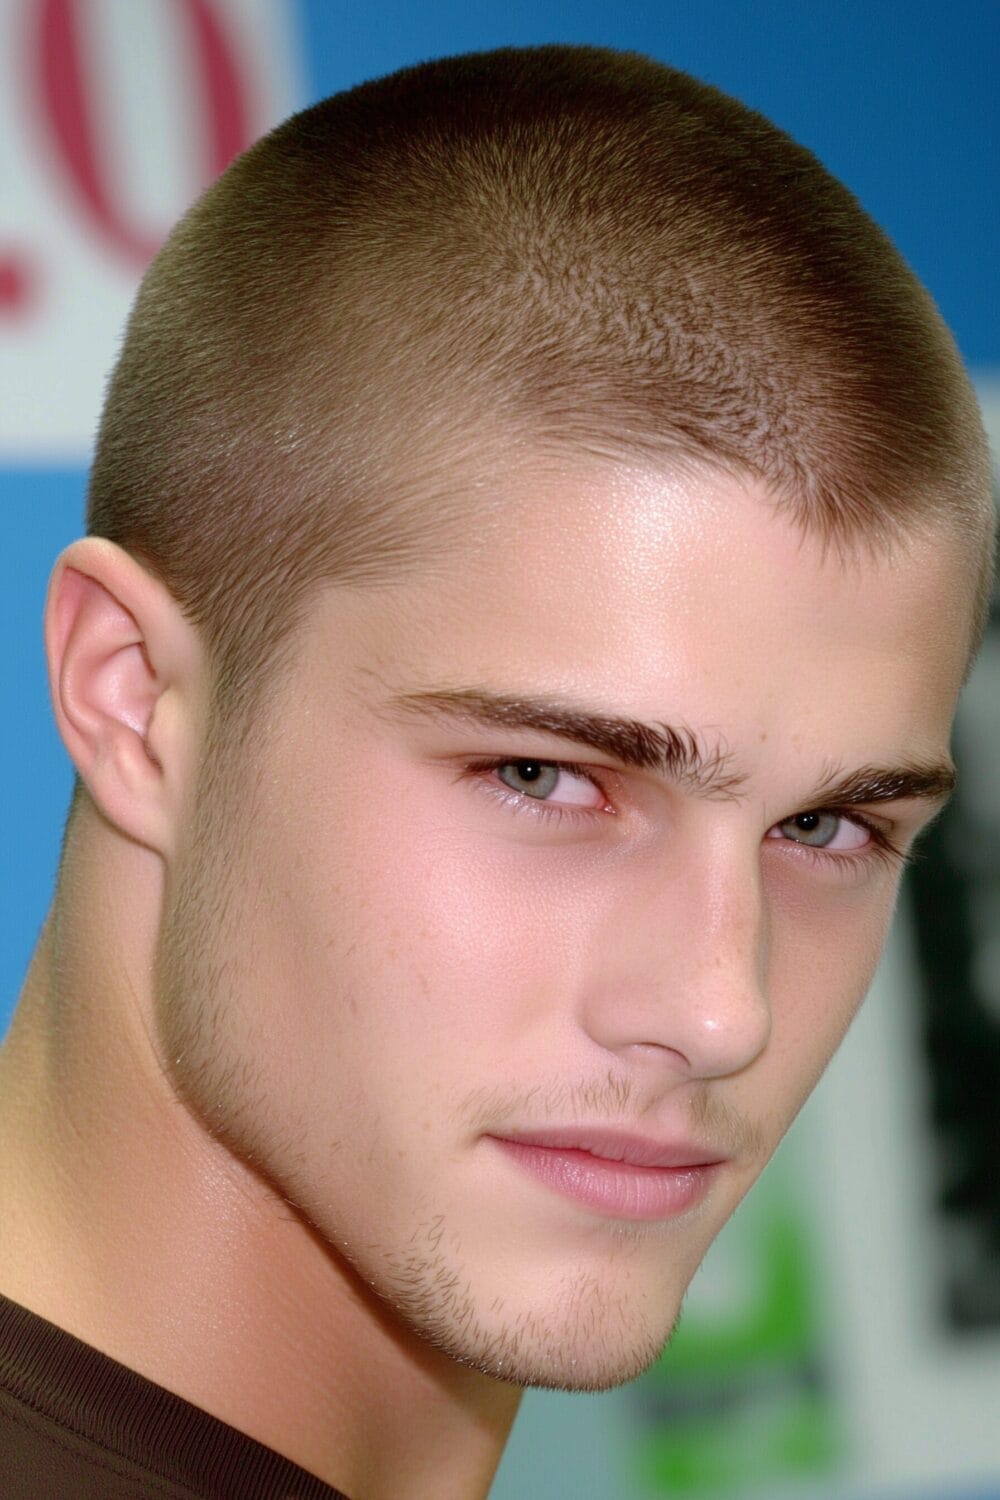
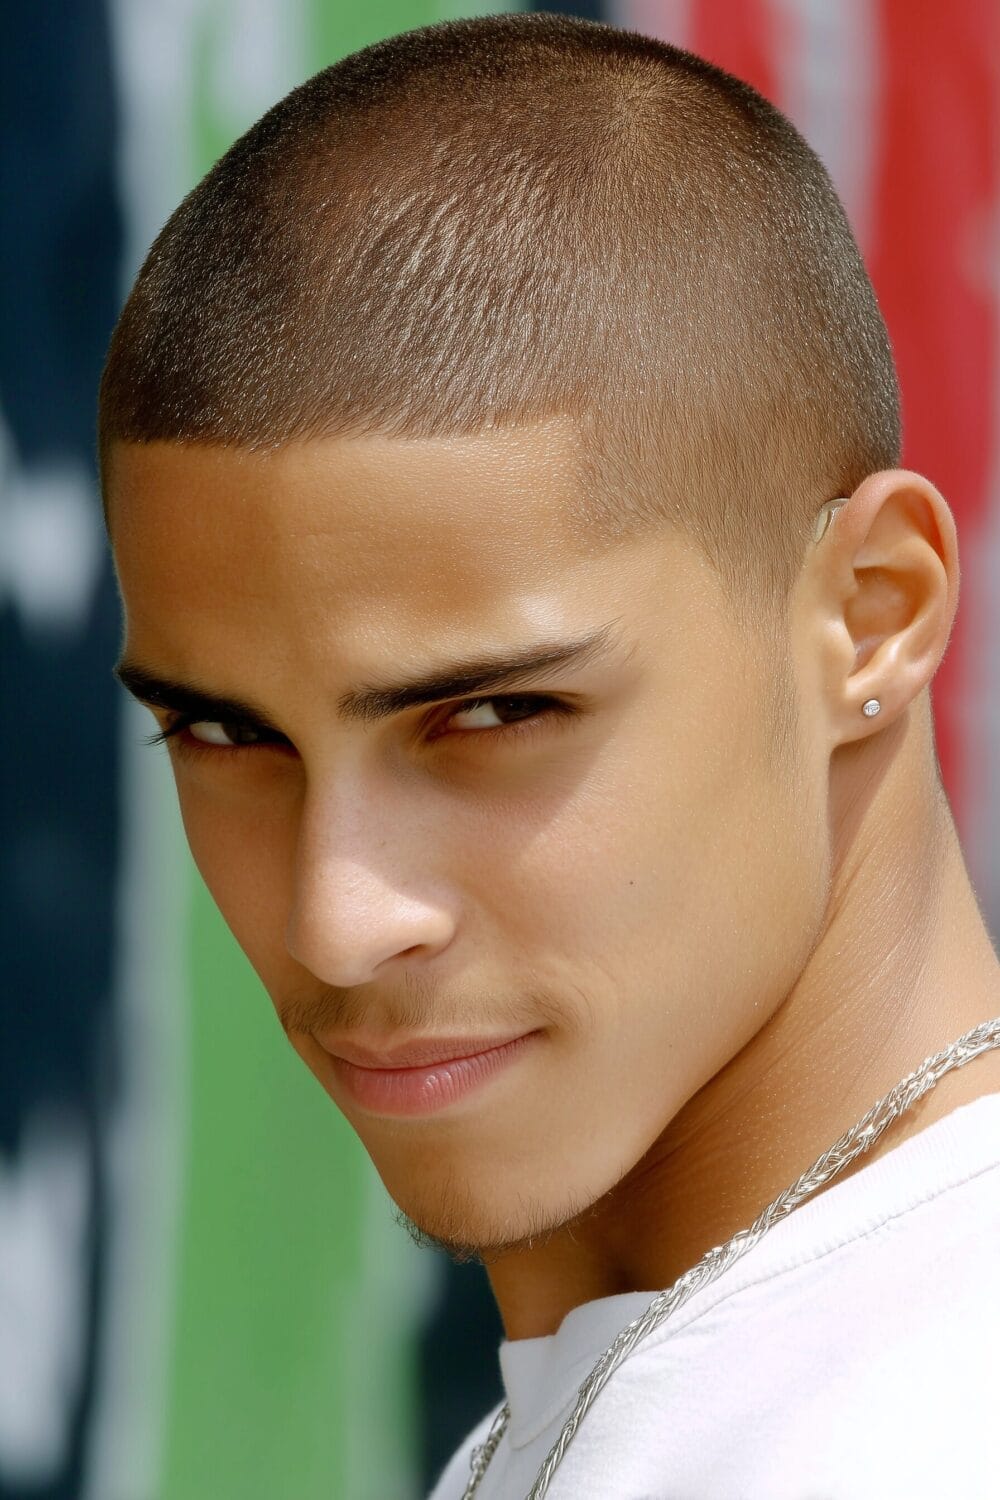
The no-guard buzz cut is the end of the line — there’s nothing between the blade and your scalp except about half a millimetre of hair. It’s the most honest haircut that exists. No hiding, no blending, no room for error.
I’ve clippered thousands of zero-guard cuts, and I always tell guys the same thing: this length either feels incredibly freeing or immediately regrettable. There’s no middle ground. Here’s how to know which camp you’ll fall into.
Key Takeaways
Not sure which style suits you best? Our Haircut Finder Quiz matches you with the right cut based on your face shape and hair type — takes 60 seconds.
A no-guard buzz leaves hair at 0.5–0.8mm — barely more than a shadow on the scalp
Feels like fine sandpaper to the touch and needs a touch-up every 3–5 days to stay clean
Best for guys with well-shaped heads and confident facial features — there’s nowhere to hide
The difference between no guard and a full shave is subtle but significant in maintenance
Scalp care becomes critical — sunscreen, moisturiser, and exfoliation are non-negotiable
A no guard buzz cut means running clippers directly against your scalp without any attachment guard, leaving approximately 0.5mm of hair. The exposed clipper bladecreates the shortest possible mechanical cut before entering shaving territory.
This ultra-close length reveals your natural head shape completely while maintaining a subtle stubble texture. Think military induction cut meets modern minimalism – practical yet intentionally styled.
Essential Tools for Perfect Zero-Length Cutting
Professional-grade clippers with adjustable blades deliver the precision you need for consistent zero-length results. Your clipper should have at least 7,000 strokes per minute for smooth cutting.
Keep blade oil, a cleaning brush, and cooling spray within reach during cutting. A hand mirror becomes essential for checking blind spots and ensuring complete coverage.
Clippers: Wahl Senior or Andis Master preferred
Maintenance: Oil blades every 2-3 passes
Backup: Trimmers for detail work
Pre-Cut Preparation Steps
Wash your hair with clarifying shampoo to remove product buildup, then towel dry until slightly damp. Clean hair cuts more evenly and prevents clipper blade clogging.
Examine your scalp for moles, scars, or irritated areas that need careful navigation. Mark these spots mentally or with a washable marker for extra caution during cutting.
Tool Talk: Clipper Blade Selection
Ceramic blades stay cooler during extended cutting sessions, reducing scalp irritation risk compared to steel. They maintain sharpness longer but cost more initially.
Steel blades heat up faster but offer superior cutting power through thick or coarse hair. Cool them with blade spray every few passes to prevent uncomfortable heat buildup.
🧠 Expert Advice
Switch to ceramic blades if you’re cutting more than twice weekly – the reduced friction saves your scalp from repeated micro-trauma. I’ve seen clients eliminate chronic irritation just by upgrading their blade material.
Starting Pattern for Even Coverage
Begin at the front hairline, moving straight back toward your crown in overlapping strips. This systematic approach ensures you don’t miss sections while establishing your baseline length.
Work in 1-inch wide passes, overlapping each previous strip by half its width. Professional barbers use this exact pattern because it guarantees complete, even coverage every time.
⚠️ Common Mistake
Starting randomly or jumping between sections creates an uneven patchwork effect that’s nearly impossible to fix without going shorter. Always follow the front-to-back pattern first, then tackle the sides systematically for professional results.
Against the Grain Technique
Move your clippers upward against natural hair growth direction for the closest possible cut. This technique catches stubborn hairs that lie flat when cutting with the grain.
Apply gentle, consistent pressure while maintaining steady upward strokes from neckline to crown. Speed matters less than complete coverage – slow and thorough beats fast and patchy.
Side Profile Cutting Method
Fold your ear forward and cut behind it using short vertical strokes. Navigate the temple area with angled passes that follow your natural hairline curve.
Use your non-cutting hand to stretch skin taut around the ear for closer cutting. This prevents nicks while ensuring no long hairs remain in the creases.
Crown and Cowlick Management
Attack cowlicks from multiple angles – forward, backward, and side-to-side – to catch every stubborn hair. Your crown’s swirl pattern requires circular motions for complete coverage.
Feel with your free hand for any remaining length differences after each pass. The crown often needs three or four approaches to achieve true uniformity.
Back of Head Blind Spot Solutions
Position a handheld mirror to see your reflection in the bathroom mirror for complete visibility. Hold clippers with your dominant hand while adjusting the mirror angle with your other.
Work in vertical strips from neckline upward, checking progress every two passes. Trust your hand’s muscle memory more than your reversed mirror vision.
⏱️ Time Investment Reality
First-timers typically spend 30-45 minutes achieving full coverage, including multiple passes and checking. Your hands need practice developing the correct angles and pressure.
After five or six cuts, muscle memory kicks in and time drops to 15-20 minutes. Professional barbers complete no guardcuts in under 10 minutes through pure repetition.
🧠 Expert Advice
Set aside a full hour for your first three attempts – rushing guarantees missed spots and frustration. Better to go slow initially and build speed naturally as your technique improves through repetition.
Pressure Control for Uniform Results
Apply just enough pressure to maintain blade contact without pressing into the scalp. Think of gliding across the surface rather than digging into it.
Excessive pressure causes razor burn and uneven cutting depth, while insufficient pressure leaves longer patches. Find your sweet spot through practice on less visible areas first.
⚠️ Common Mistake
Pressing harder to cut faster actually slows you down by causing skin irritation that needs healing time. Light, consistent pressure with multiple passes always beats one aggressive attempt that leaves your scalp raw.
Overlap Strategy for Seamless Blending
Each clipper pass should overlap the previous one by 30-50% to eliminate visible lines. This redundancy ensures no strips of longer hair remain between passes.
Visualize mowing a lawn where each strip slightly covers the last one. The overlap creates seamless blending that looks professionally executed rather than DIY.
Round Face Enhancement
Zero length hair creates instant angular definition by removing the softening effect of longer styles. Your facial features appear more structured and defined without hair framing.
The stark contrast between skin and stubble adds geometric sharpness to curved features. This length essentially reframes your face with clean, decisive lines.
Square Face Compatibility
Strong jawlines shine with no guard length since nothing competes with your natural bone structure. The minimalist approach amplifies your masculine features without distraction.
Your angular features harmonize perfectly with the military precision of ultra-short hair. This combination projects confidence and intentional style choices.
Oval Face Versatility
Oval faces work with virtually any style, but no guard cutting showcases your balanced proportions beautifully. The symmetry of your features needs no hair styling to look proportional.
This length maintains your natural harmony while adding an edge of boldness. You’re essentially working with a perfect canvas that needs minimal enhancement.
Long Face Considerations
Zero length creates horizontal emphasis by removing vertical hair height that elongates faces further. The buzzed texture adds visual width through its uniform stubble pattern.
Your proportions appear more balanced when hair doesn’t add extra length above. This cut actually works as a corrective measure for elongated face shapes.
Heart-Shaped Face Benefits
Removing hair volume at the temples reduces your forehead’s visual width significantly. The buzz cut rebalances your proportions by eliminating top-heavy hair volume.
Your narrower chin gains emphasis when competing hair volume disappears from above. This creates better facial harmony between upper and lower face sections.
Neckline Detailing Techniques
Create your neckline by cutting downward from your established length to bare skin. Use your trimmer’s edge for precise line definition without guard attachments.
Natural necklines follow your hair growth pattern about an inch above your collar. Avoid cutting too high, which creates an unnatural floating appearance.
Hairline Shape Preservation
Follow your existing hairline’s natural curves rather than attempting to straighten or reshape them. Work with what genetics gave you for the most authentic appearance.
Use shorter strokes around your hairline edges for better control and precision. This prevents accidentally cutting into your forehead or creating unnatural angles.
Post-Cut Skin Treatment
Apply witch hazel immediately after cutting to close pores and prevent bacterial invasion. Follow with fragrance-free moisturizer to soothe any micro-abrasions from cutting.
Avoid touching your freshly buzzed scalp for several hours to prevent irritation. Your skin needs time to calm down from the mechanical stimulation.
Weekly Maintenance Schedule
Most men need touch-ups every 5-7 days to maintain that fresh-cut appearance. Fast growers might require twice-weekly sessions during summer months.
Schedule your maintenance cuts for consistent days to establish a routine. Sunday and Wednesday work well for twice-weekly maintenance, while Friday keeps you sharp for weekends.
Not sure what your face shape is? Our Face Shape Detector figures it out in 4 quick questions.
Moisturizing Protocol for Scalp Health
Apply lightweight, non-comedogenic moisturizer daily to prevent dryness and flaking. Your exposed scalp loses moisture faster than skin protected by longer hair.
Massage the product in circular motions to stimulate blood flow and absorption. Look for ingredients like jojoba oil or ceramides that mimic natural scalp oils.
Sun Protection Essentials
Apply SPF 30+ sunscreen to your entire scalp 20 minutes before sun exposure. Reapply every two hours during extended outdoor activities or after sweating.
Consider wearing hats during peak sun hours even with sunscreen applied. Your buzzed scalp receives direct UV exposure that longer hair normally filters.
Dealing with Visible Scalp Imperfections
Gradual tanning evens out skin tone differences and minimizes scar visibility over time. Start with brief sun exposure sessions to build color without burning.
Concealer or tinted moisturizer can temporarily camouflage prominent marks for special occasions. Blend carefully at edges for natural-looking coverage that doesn’t transfer.
Quick Touch-Up Between Full Cuts
Focus on visible areas like hairline andsideburns for 5-minute refresh sessions. These high-visibility zones show growth first and impact your overall appearance most.
Keep a cordless trimmer handy for emergency touch-ups before important meetings. Quick edge cleaning maintains your sharp appearance between full maintenance sessions.
Barbers achieve perfectly even coverage through experience and better sight angles for difficult areas. Their professional clippers also cut more efficiently through varying hair textures.
DIY cutting saves money and time but requires patience developing proper technique. Most men achieve 85-90% of professional quality after mastering the basics.
Transitioning from Longer Styles
Consider stepping down gradually through progressively shorter guards over several weeks. This allows psychological adjustment while testing your comfort with minimal length.
Alternatively, commit fully for immediate results and maximum impact – no middle ground. The shock value often becomes confidence once you adjust to your new look.
Growing Out Timeline and Stages
Expect visible stubble within 3-4 days and 1/8-inch growth after two weeks. The awkward phase hits around week three when length becomes uneven.
Full recovery to a short buzzed style takes 4-6 weeks depending on growth rate. Plan your growing-out phase around less important social periods.
Seasonal Considerations for Zero Length
Summer’s heat makes no guard length incredibly practical for temperature regulation and comfort. Sweat evaporates instantly without hair trapping moisture against your scalp.
Winter requires hat-wearing discipline since you lose significant head warmth without hair insulation. Keep multiple beanies handy for outdoor activities.
Athletic and Active Lifestyle Benefits
Swimmers and runners particularly benefit from eliminated drag and instant post-workout drying. Helmet sports become more comfortable without hair bunching underneath.
Gym sessions improve with zero hair maintenance between sets or cardio transitions. Your focus stays on performance rather than fixing disheveled hair.
No Guard Buzz Cut vs Shaved Head: The Real Difference
This is the question I answer more than any other about this cut: “Is a no-guard buzz the same as shaving?” No — and the difference matters more than you’d think.
A no-guard buzz cut uses clippers without an attachment, leaving approximately 0.5–0.8mm of hair. You can see stubble, feel texture, and the hair provides a very slight shadow on the scalp. A shaved head uses a razor (or foil shaver) to remove hair completely down to skin level — smooth, shiny, no shadow.
The maintenance difference is significant. A no-guard buzz needs a touch-up every 3–5 days to stay clean. A razor shave needs repeating every 1–2 days because regrowth is immediately visible and feels rough.
Razor shaving also carries risks — ingrown hairs, razor burn, and nicks — that clippers don’t. I recommend the no-guard buzz to guys who want the bald look without the daily razor commitment.
The Confidence Factor
Going to zero length is an emotional decision as much as a practical one, and I’ve sat with enough guys through this moment to know the pattern. There’s usually a 10-second silence after the last pass where the client stares at themselves processing the change. Then, about 80% of the time, a smile. The remaining 20% need a day or two to adjust — but almost nobody asks me to “put it back on.”
If you’re considering a no-guard buzz, the guys who handle it best are the ones who’ve already mentally committed before they sit down. If you’re still debating in the chair, start with a number 1 instead. You can always come back for zero next time.
Ready to Find Your Perfect Cut?
You’ve read about the styles. Now find the one that fits YOUR face shape, hair type, and lifestyle.
🎬 BUZZ CUT TIPS FOR FIRST TIME 0 GUARD BALDING HAIR CUT
FAQs
How often should I maintain a no guard buzz cut?
Most people need touch-ups every 5-7 days to maintain the fresh-cut appearance, though faster hair growth may require cutting twice weekly.
What’s the main difference between no guard and a grade 1 buzz?
No guard leaves approximately 0.5mm of hair using just the clipper blade, while grade 1 leaves 3mm, creating a noticeably longer, less exposed-scalp look.
How long does a DIY no guard cut typically take?
First attempts usually require 30-45 minutes for thorough coverage, but with practice, you can achieve professional results in 15-20 minutes.
Will a no guard buzz cut help with thinning hair appearance?
Yes, it creates uniform coverage that eliminates the contrast between thin and thick areas, often making hair loss less noticeable.
What’s the best way to prevent razor bumps after cutting?
Apply witch hazel immediately after cutting, followed by a lightweight, alcohol-free moisturizer, and avoid touching the freshly cut area for several hours.
Khamis Maiouf is a professional barber who graduated from Hinckley College in England with a Level 3 qualification in hairdressing. With over 20 years of experience, he is an award-winning barber who has mentored numerous students and styled thousands of clients. A recognised expert featured on StyleCraze (20M+ readers).
Credentials: Level 3 Hairdressing (Hinckley College, UK) • 20+ Years Professional Experience • Featured Expert on StyleCraze • Founder of Book of Barbering