The Ultimate Newbies Guide: How to Cut Your Hair at Home
Have you ever found yourself in a situation where you desperately need a haircut but can’t make it to the salon? It could be due to a busy schedule, lack of money, or any other reason. Taking matters into your own hands and learning how to cut your hair at home could be the only option.
Cutting your own hair is more daunting than it looks, but with patience and practice, you can become your own hairstylist and achieve a well-groomed look without spending a fortune.
A messy hairstyle easily ruins an otherwise impeccable appearance. This guide will provide essential tips to help you start cutting your hair at home.
1. Wash Your Hair
Before you begin cutting your own hair with clippers, it’s essential to wash your hair to remove any wax or other substances that may be tangled in it.
Once you’ve washed your hair, be sure to thoroughly dry it, as clippers can have difficulty cutting through wet hair.

2. Set Up Your Equipment at Home
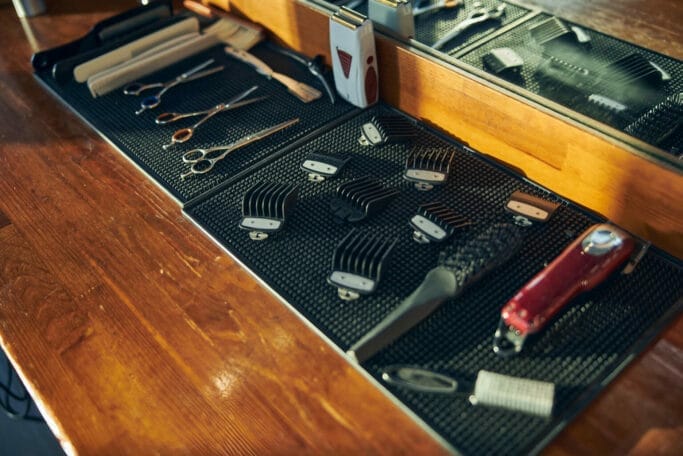
When cutting your own hair at home, having the right tools is crucial to achieving a professional-looking result.
Quality clippers are essential, and while they don’t need to break the bank, investing in a good pair is necessary.
Cheaper clippers may chew on your hair, break down quickly, or rust easily.
Adjustable blade clippers are a popular choice for home haircuts. They feature a side lever that allows you to control the length of your cuts.
This gives you further control over how much hair you cut aside from clipper combs. With a quick flick of the lever, you can even layer your hair mid-cut.
For those seeking a more advanced cutting experience, detachable blade clippers are like the Cadillac of haircutting tools. They provide crisper cuts and a more professional feel.
However, detachable blade clippers work differently from adjustable blade clippers. If you are a beginner who may not know how to cut your hair at home, you’ll definitely find swapping blades overwhelming.
They also tend to be more expensive and require more maintenance.
While comb sets are available for detachable clippers, many professionals prefer using naked blades for the best results.
For most people, an adjustable blade clipper is a straightforward, affordable option with various accessories.

3. Using a Clipper to Cut Your Hair
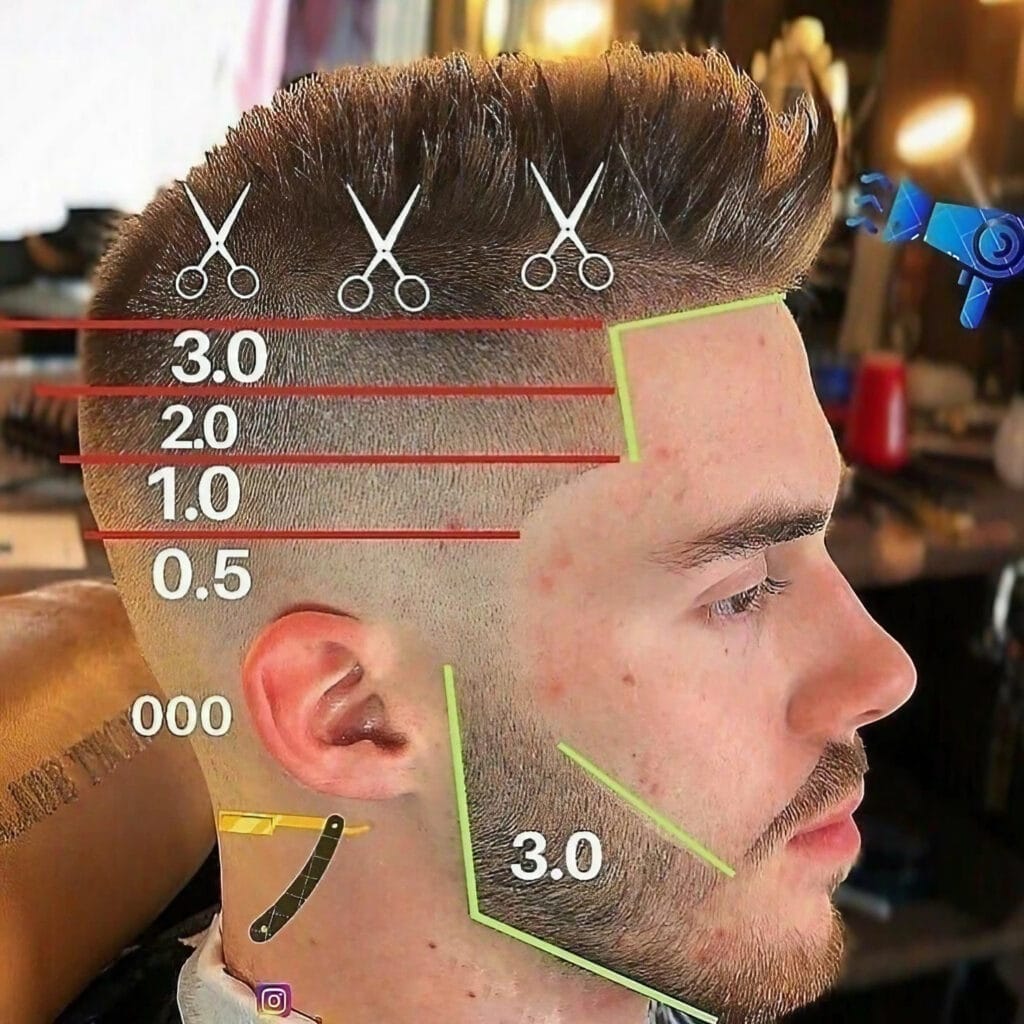
Do you understand how to cut your hair at home with minimal effort? You’ll require to segment the head into sections of A, B, C, and D, as shown in the photo.
- Area A for clippers
- Area B for scissors
- Area C for long hair
- Area D for fringe
- look at the picture below

Cutting area A with clipper N 3
The illustration below will make you understand how to cut your hair at home.
- Set the clipper to guard number 3.
- Start softly pulling the clipper up from the bottom to the red line (temple level)
- You must always work against the grain to get an even cut.
- Follow the red arrow.
- Keep repeating the steps until you have completed sector A

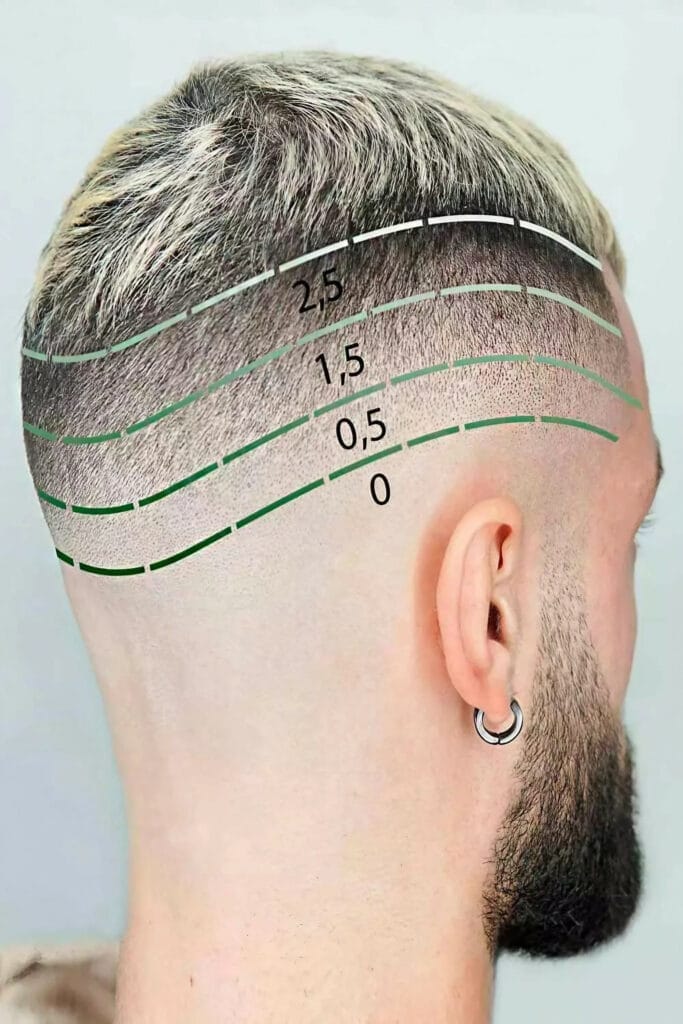
Cutting area A with clipper N 2
Follow these steps if you want the hair on the sides and back to be shorter.
- Set the clipper to guard number 2.
- Start softly pulling the clipper up from the bottom to the green line.
- You must stop at the green line.
- Repeat the process until you finish.
- You always need to cut against the growth of hair.
To achieve a short look on the sides of your head, you should use guard number 1 and follow the same steps as before.
If you want an even shorter look, try using guard 0.5, but be cautious, as this requires a higher blending ability.
Avoid going too short if you’re not experienced with blending.

Cutting Area B with Scissors
Area B needs to be blended with Area A. To achieve this, you need to follow these steps.
- To smooth the hair down, use a comb and cut it from the bottom.
- Grab the tuft from section B between your index and middle fingers and cut with 45 degrees of an angle, as can be seen in the image.
- Be sure to first cut the same length all over and then go back for some layering.
- Comb the hair in the desired areas before beginning the cut.

4. Cutting the Top of Your Hair (area C)
When cutting your own hair, you need to begin by wetting the hair with water and combing it down. It’s important to keep the hair damp when working with scissors to help separate and cut it.
If you have thick hair, use a wide-tooth comb.
- Separate the fringe from the rest of your hair.
- Raise a tuft from area C between your fingers at 360 angles degrees. Continue cutting the hair at the top of the head of these sections.
- Grab another tuft between your index and middle finger and cut all that hair stick out.
- Keep repeating the steps until you finish the whole section.

Cutting the Fringe (area D)
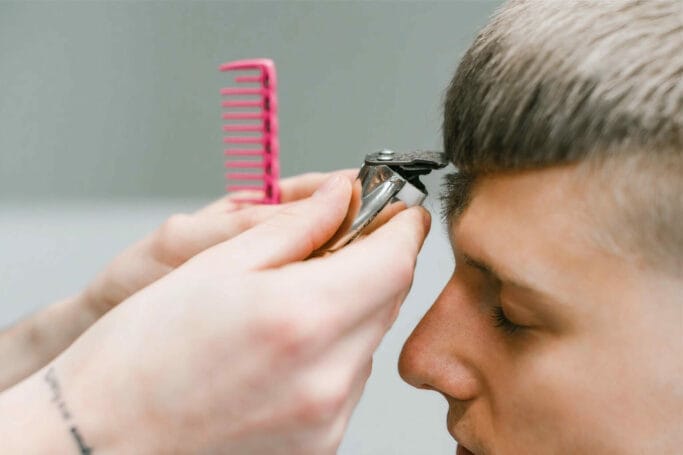
You need to follow these actions to cut the fringe at home. The fringe plays a major role in magnifying your look, as you know.
- Dampen your hair a little.
- Comb your hair straight toward your face.
- Decide how much to take off.
- You must always cut just a little unless you have experience.
- Instead of chopping it into big chunks, snip at your hair.

How to Trim Your Hair
Learning how to cut your hair at home can be a cost-effective way to keep your hair looking tidy in between salon appointments.
Before starting, washing and conditioning your hair and allowing it to dry completely is important. This helps to prevent taking off too much length, as hair can shrink as it dries.
Use a brush to detangle any knots, and mist with water if necessary. Having the right tools on hand is essential. You’ll need a pair of shears or clippers and a comb.
Use clips to section your hair into manageable segments, and drape a cape or towel over your shoulders to prevent hair from getting on your clothes.
When trimming, it’s best to be conservative and focus on minor adjustments rather than a complete restyle. Snip with the ends of the shears instead of the entire blade length to avoid taking off too much.
Do you want to know how to trim hair by yourself? Follow the advice below that best applies to your hair type:
- For straight hair: Start at the back and work your way forward. Use a comb to separate a section of hair, hold it between your fingers, and trim the ends with the shears.
- For curly hair: Cut the hair when it’s dry and in its natural state, as curly hair can shrink up to two inches when dry. Use your fingers to separate and trim individual curls to avoid creating blunt ends.
- For layered hair: Use the point-cutting technique to create a soft, blended look. Hold the shears vertically and snip into the ends of the hair rather than cutting straight across.
- For bangs: Cut the hair when it’s dry and style it as you normally would. Use the point-cutting technique to create a natural-looking, blended edge.
Remember, if you’re unsure or not confident in your skills, many online tutorials are available to help guide you through the process.

How to Cut Your Own Hair in Layers
- Start with clean, damp hair that is free from tangles. Use a wide-toothed comb to comb through your hair to ensure it’s neat.
- Gather your hair at the top of your head and fasten it with a hair elastic. Make sure that the ponytail is at the apex of your head and smooth against your head to avoid messy layering.
- Move the elastic down the ponytail to create the desired length of layers. For subtle layering, leave only an inch of hair in the ponytail. For more dramatic layers, leave a few inches.
- Use sharp haircutting scissors to cut your own hair just above the elastic. Hold your hair at the elastic to keep it from coming loose.
- Shake out your hair and examine your layers. This method creates a few face-framing layers in the front with longer layers in the back.
- If you want to adjust the length of your layers, use the scissors to carefully cut individual locks of hair. Cut at an angle to create a textured look.
Remember, this technique is best suited for people with straight or wavy hair that is fine or medium. This method may not work better for you if you have curly or coarse hair. So, you’ll need to consult a professional hairstylist for the best results.

How to Make Your Hair Last Longer
Whether you’re trying to save money, avoid small talk, or just prefer the convenience of home haircuts, here are some things to keep in mind.
First and foremost, start with a good haircut. If your barber does a great job, your hair will naturally look better for longer.
A good haircut should be tailored to your face shape and hair type. And it should take into account your personal preferences and styling habits.
Once you’ve got an excellent haircut, the key to making it last longer is to take good care of your hair.
This means using the right products and avoiding damaging habits like excessive heat styling or rough towel-drying.
Use a gentle shampoo and conditioner formulated for your hair type, and avoid over-washing your hair, as this can strip away natural oils that keep your hair healthy.
Try to use a light touch and avoid using too much product. Use a comb or brush to distribute the product evenly throughout your hair.
Avoid pulling or tugging on your hair, as this can cause breakage and damage.
Another tip for making your haircut last longer is to trim your hair regularly at home.
Even if you’re uncomfortable doing a full haircut, you can use clippers or scissors to trim your hair around your ears and neckline. This will make a big difference in how your haircut looks.
Remember that your hair will inevitably grow and change over time. So, don’t be too hard on yourself if your haircut doesn’t look perfect every day.

Conclusion
Learning how to cut your hair at home can be a nerve-wracking experience for newbies. It’s more challenging if you don’t know how to cut your own hair short. But with a bit of practice and confidence, it can save you time and money in the long run.
Trusting your ability and envisioning the end result is essential, even if it doesn’t come out exactly as planned.
FAQs
Should I Cut My Hair Wet or Dry at Home?
If you’re planning to cut your own hair at home, it’s better to cut it when it’s dry rather than wet. Cutting wet hair can lead to it bouncing up and ending up shorter than you intended.
What is the healthiest way to cut your hair?
To keep your hair looking healthy, it’s important to understand that cutting your hair more frequently won’t make it grow faster.
Trimming your hair helps keep it healthy as it grows, but doing it every 6-8 weeks is unnecessary. Instead, you can wait for around 3-4 months before getting a trim.
When cutting your hair, it’s important to layer it according to your hair texture. Skip shampooing your hair before cutting it, and get a natural haircut when it’s dry at a salon.
References:
To look suave and well-groomed, you don’t have to go out and spend money on a haircut. source
These tips and techniques can help if you can’t get to the salon. source
Khamis Maiouf is a professional barber who graduated from Hinckley College in England with a degree in hairdressing. He has also won several barbering contests and successfully operated a barbershop for the last two decades. As a skilled hair stylist for 20 years, his goal is to teach others how to achieve a beautiful appearance through their hairstyles.


![39 Classy Balding Men Haircuts [Overcome Baldness] 28 39 Classy Balding Men Haircuts [Overcome Baldness]](https://eo54oy2xq6y.exactdn.com/wp-content/uploads/2022/11/Balding-men-hairstyle-36-300x300.jpg?strip=all&lossy=1&ssl=1)

