

— Award-Winning Barber · 20+ Years Experience · Level 3 Qualified
The lightning bolt has quietly become the most requested hair design in my chair in 2026 — bigger than the star, bigger than the classic double-line part, and finally overtaking the tribal-style tramline that dominated the last few years. TikTok #barber tags have pushed it back into the mainstream, but the version I’m cutting today is not the same 2010s bolt: it lives inside a burst fade, uses half-guard steps in the background, and often hides on a panel above the ear so the wearer can still walk into a corporate office. This guide is the full playbook — placement, guard depths, aftercare, pricing, and the exact wording to bring to your barber for a bolt that looks like it belongs on your head.
Key Takeaways
- A well-cut bolt reads sharp for 10-14 days; book a 15-minute touch-up before day 14 to keep it photo-ready
- The winning contrast in 2026 is a #2 (6mm) background with the bolt trimmed to #0 / skin — anything shallower blurs on camera
- Expect $10-30 extra for a single bolt, $25-45 for a double or triple, $60-120 for a coloured-fill or full-head network
- Placement beats size — a bolt in the burst-fade transition zone above the ear outperforms every other spot for camera visibility
- Long hair on top with a bolt hidden in an undercut panel is the workplace-safe version I recommend to every professional client
How to Ask Your Barber for a Lightning Bolt Design
Walk in with three things and you’ll get exactly what’s in your head. First, a printed reference photo — screenshots on a cracked phone are useless in the light of a shop. Second, a specific fade type (“skin fade with a soft burst around the ear” or “mid fade with a hard line at the temple”), because the fade decides where the bolt can live. Third, know your placement in words your barber uses: above the ear on the right, angled from the temple back toward the crown, vertical on the nape. Never say “somewhere on the side” — that’s how you end up with a bolt in a spot that doesn’t photograph well. The last question I want every client to ask before the trimmer touches skin is “can you draw it on with the eyeliner first?” — a wax pencil takes 30 seconds and saves a haircut you’ll otherwise wear for two weeks. If you’re still deciding on the underlying cut, our haircut finder quiz is the fastest way to shortlist styles that pair well with a design.
What Is A Lightning Bolt Haircut?

A lightning bolt haircut is a zig-zag design cut into the shaved or short-length section of a fade, using a trimmer detailer to take the hair down to skin along the bolt path. What separates a good bolt from a barbershop meme is proportion — the classic three-segment zig-zag with a 45-degree top stroke, a steeper middle diagonal, and a shorter bottom flick. Modern versions use two or three parallel bolts, curved “electric” variants, and geometric interpretations that read almost like graphic-design line art. It sits inside your regular haircut, so once your top hair is styled the bolt becomes the accent — not the whole look — which is why grown-ups can pull it off in 2026 without looking like they raided a 2011 lookbook.
Classic Lightning Bolt Designs

The classic bolts are the ones I default to when a client isn’t sure — they age well, photograph well, and don’t lock you into a trend that will look dated by next season. Every classic version below sits on a #2 background (6mm) with the bolt itself trimmed to skin using a T-blade detailer. Ask for the “clean edge” finish rather than the softened one — the sharp inside corners of a classic bolt are the whole point.
Single Side Lightning Bolt

The one-bolt cut is the version I recommend to any first-timer. Cut on the right or left side above the ear, roughly 4-5 inches tall and about 1.5-2 inches wide at its widest point, it delivers unmistakable visual impact without eating up the whole side of your head. Pair it with a low fade so most of the surrounding hair stays long — the bolt then reads as a deliberate accent rather than a haircut that’s been through a printer error. This is also the easiest bolt to grow out cleanly, because there’s no second design pulling the eye when the edges start to blur at week two.
Double Lightning Bolt Pattern

Two parallel bolts running down the temple hit the sweet spot between visible and controlled — my favourite for guys 18-30 who want something that reads in a group photo without being the entire personality of the haircut. Keep the gap between the two bolts to about the width of your index finger (roughly 15mm); any tighter and they merge into a chunky stripe once the hair grows a couple of days. Ask for the bolts to be angled the same way and the same size — mirror-image doubles (“this way then that way”) never look intentional and I actively steer clients away from them.
Triple Bolt Stack Design

Three bolts stacked one above the other, running from just behind the temple back toward the crown, is the loudest of the classic looks and the one I see most on TikTok this year. It needs real estate — you need at least 6 inches of shaved side panel to fit them without them cramping — so it only works with a mid fade or higher. Space each bolt about 20mm apart, keep them the same size and angle, and make sure your barber cuts all three at the exact same guard depth. Uneven depth is what makes a triple stack look “off” in photos even when the shape is right.
Minimalist Thin Lightning Line

The minimalist bolt uses a 1-2mm line width — basically the width of a single detailer pass — and reads almost like a line-art tattoo of a bolt rather than a shaved-out shape. This is my go-to for older clients and creative professionals: architects, designers, guys who wear glasses and want something intentional but not loud. It survives a corporate dress code better than any other version because from more than three feet away it just looks like a very clean part line. Only downside — it blurs first, so book your touch-up at day 9-10, not day 14.
Bold Thick Lightning Bolt

The bold thick bolt inverts the minimalist — 8-15mm wide, cut with the wide side of the trimmer, deliberately blocky rather than surgical. On the right head shape (rounder faces, thicker features) this looks like a designer piece rather than a haircut. Ask for the corners to be sharp-cornered rather than rounded — a rounded thick bolt looks like a printing error. Best paired with a high skin fade so the bolt has a full clean canvas around it, and best done in one solid piece rather than as part of a stack.
Lightning Bolt Placement Options

Placement is the decision that will make or break the finished cut. The rule of thumb I give every client: the bolt must sit somewhere your camera phone picks up in a normal selfie, and somewhere the surrounding hair is short enough to give it contrast. That narrows the workable zones to the five below. Do not let a barber talk you into a bolt inside the deepest part of a skin fade — bare skin swallows the design.
Temple Lightning Bolt Design

The temple is the most photographed spot on the human head — it’s the zone that shows in every straight-on selfie and every three-quarter angle. A temple bolt starts about half an inch above the ear, angles up and back toward the crown, and lives on the #2 zone above the fade line. This placement works with any fade type, works on any face shape, and is the one I recommend to 60% of clients. Ask specifically for the top of the bolt to sit at your natural hairline height — any higher and it disappears into the styled top, any lower and it looks like a scar.
Behind The Ear Lightning Pattern

Behind-the-ear is the workplace-safe placement — visible when you turn your head but invisible in a straight-on business meeting. I put this on a lot of teachers, coaches, and office professionals who want a design without a conversation about it. The bolt should curve slightly to follow the shape of the ear rather than sitting bolt-upright; a straight vertical bolt behind the ear looks stitched-on. Cut it 3-4 inches tall, and let your barber angle the top to match the ear’s natural back-slope.
Nape Lightning Bolt Art

Nape bolts are the sleeper hit of 2026. Because they sit on the back of the head, you never actually see them yourself — which sounds like a con but is actually the reason they never date badly. Ask for a horizontal bolt running across the nape, or a vertical bolt centred on the spine of the neck. The nape is a flatter, more forgiving canvas than the side, so nape bolts can be bigger (up to 6 inches long) without dominating. This is also the placement I recommend for a first bolt on a client who is worried about commitment — hairstyle stays untouched from the front and the design “reveals” only when the head turns.
Crown Area Lightning Design

Crown bolts sit inside the top-back of the head and need long hair on the surrounding sides to hide them properly — which sounds like a niche use but is actually one of the most requested “hidden” placements right now. It only works if you already wear your hair long enough on top to cover the crown and can gel it or push it back to reveal the bolt when you want to. Think of it as a switchable design: hair down, invisible; hair styled up, on show. Best done with a longer top length so you’re not constantly worrying about the design showing when you don’t want it to.
Full Side Panel Lightning

Full side-panel is the maximalist bolt — a large single or double bolt taking up the entire shaved-sides section from ear to crown. This is not a starter design. The whole side of your head is now the piece; the top haircut has to support it, the fade has to be flawless, and you have to be prepared to sit for a 90-minute appointment. When it’s right, it’s the version that ends up on the shop’s Instagram grid. When it’s off by 5mm, the whole cut looks off-balance, so pick a barber whose portfolio you’ve actually seen do this exact placement.
Lightning Bolt With Fade Combinations

The fade is what makes the bolt read. A bolt cut into a badly-blended fade looks like graffiti; a bolt cut into a proper half-guard fade reads like a graphic. In 2026 the strongest bolt-friendly fades are the burst, the mid, and the drop — I’ll walk you through each below. As a rule, the deepest part of your fade should be at least 2 inches away from the bolt so the design lives on a #1 or #2 background, not on bare skin. If you’re new to guard numbers, our men’s haircut guide lays out the guard-to-length chart every barber uses.
Low Fade With Lightning Bolt
The low fade wraps just above the ear and keeps most of the side hair long. It gives the bolt a wide, high canvas above the fade line and works best with a single bolt or a minimalist thin line. This is the most conservative fade-and-bolt combination and the one I put on most professional clients — the low fade grows out gracefully, and the bolt only becomes visible at close range.
Mid Fade Lightning Design
The mid fade is the workhorse — deepest point around the temple, plenty of #1/#2 canvas above it for the bolt to live on. If you can’t decide between fade types, get the mid: it flatters every face shape, it survives a lazy touch-up week, and every version of the bolt in this guide works on it. Ask for the fade to blend up into a #2 zone before it hits your top length — that’s the depth the bolt is going to sit on.
High Fade Lightning Pattern
The high fade pushes the fade line up above the ear by 1.5-2 inches and gives you a huge canvas — usually enough for a triple stack or a full side-panel design. Only pick this if you’re committing to fortnightly touch-ups; the higher fade line grows out into a visibly untidy shape faster than low or mid fades. Also, keep the top long enough to visually balance the amount of shaved side — a high fade with a very short top and a big bolt is a lot of look at once.
🧠 Expert Advice
Sit in the chair with the design already drawn on paper — not on your phone. Reference photos on a screen never match the angle a barber sees your head at. A quick pencil sketch of the bolt at real size on the back of an appointment card lets you agree on placement, thickness and angle in the mirror before the trimmer switches on. This one 30-second step has saved every crooked-bolt callback I’ve ever avoided.
Skin Fade Lightning Bolt Combo

The skin fade is my most-requested pairing for the bolt in 2026, but it comes with a rule: the bolt sits on the #1 or #2 transition zone above the skin, never on the bare skin itself. On the bare part the bolt disappears (you’re just cutting skin on skin) and the whole design collapses. Cut the fade first, then map the bolt on the #1/#2 zone with a wax pencil, then trim. The finished cut looks like the bolt is glowing on top of the fade — that’s the magic.
Drop Fade With Lightning Art

The drop fade dips behind the ear rather than staying level, and that curve becomes an arc that a bolt can follow. My favourite drop-fade bolt design curves the bottom of the bolt along the fade line — so the bolt itself has a shape that mirrors the fade’s curve. This is one of the most technically demanding bolts to cut properly, so it’s worth booking with a barber whose portfolio shows curved detail work rather than just straight-line shapes.
Burst Fade Lightning Design

The burst fade radiates outward from the ear in a semicircle, and the sweet spot where the burst arcs up into the temple is genuinely the best real estate on the entire head for a lightning bolt. This is the placement that will look right in every camera angle. A single bolt riding the top of the burst curve is the cleanest 2026 look full-stop, and it’s what I’d cut for myself if I still had time between clients on a Saturday.
Modern Lightning Bolt Variations

The modern variations are the ones I’m seeing pushed hardest by the young barbers on Instagram and TikTok this year. They’re not classic bolts — they take the base zig-zag idea and stretch it into art. Some are stunning; some age badly. Below is what to know before you ask for one.
Geometric Lightning Pattern

Geometric bolts use hard straight edges, tight angles, and a design language borrowed from architectural drawing. Instead of the flowing three-segment classic bolt, you get sharp 45- and 90-degree segments that feel deliberate, almost printed. Great on square faces and short-crop tops; less flattering on rounder features. Ask your barber to actually sketch the shape on paper first — geometric bolts leave no room for improvisation.
Curved Lightning Bolt Design

Curved bolts trade the sharp classic zig for smooth “electric” curves — think the outline of a stylised lightning cartoon rather than a real bolt. These read softer, work well on longer surrounding hair, and are more forgiving as they grow out because the eye reads curves as intentional even when they blur. If you’re worried the classic bolt is too aggressive-looking, this is the version to ask for.
Abstract Lightning Art

Abstract bolts are barely bolts at all — a bolt-inspired shape broken into fragments, shifted, layered, or crossed with other geometric marks. Custom, expensive, portfolio-piece work. Only book this with a barber whose Instagram grid is full of finished abstract designs on real clients. It is not something to try on someone whose regular work is fades and beards.
⚠️ Common Mistake
Do not let the barber shave the bolt on the deepest part of a skin fade. Bare skin is a flat white surface — the bolt disappears against it in photos and looks like a shaving nick from a distance. The design lives in the transition zone above the fade line, where the hair is at #1 to #2, so the shaved-to-skin bolt has a full field of dark hair to sit against. Every professional-looking bolt you see online obeys this rule.
Interconnected Lightning Network

Interconnected networks link multiple bolts into a web of zig-zag lines running across the whole shaved section, often wrapping from temple to nape. It is the flashiest bolt design available and photographs incredibly, but you need to commit — networks require touch-ups every 10 days and don’t grow out gracefully. Best for guys already deep into design culture, not a first design.
Reverse Lightning Bolt Pattern

Reverse bolts flip the direction — the classic zig-zag runs top-to-bottom instead of bottom-to-top, or angles the “wrong” way for that side of the head. Subtle but instantly readable to anyone who knows the code. It’s a nice signature move for a second or third bolt, once you’ve already done a classic. On a first bolt, most people just read a reverse as an accident.
Lightning Bolt For Different Hair Types

Every hair type carries the bolt differently. The design doesn’t change — the reveal does. Below is what I actually see on real clients across the four textures I cut every week, plus the extra step for thick hair.
Lightning Design On Straight Hair

Straight hair gives the sharpest, cleanest bolt read of any texture — the surrounding hair lies flat, the edges of the design don’t get camouflaged by curl, and the finished piece looks almost stencilled. On the flip side, straight hair is the least forgiving as the bolt grows out; every millimetre of blur is visible from three feet away. Book touch-ups at day 10, no later.
Curly Hair Lightning Pattern

Curly hair is the most flattering texture for a bolt — the tight coils around the design give a huge natural contrast that makes even a modest bolt read strongly. Keep the surrounding curls dense (don’t over-fade) so the bolt sits inside a curly frame rather than on skin. This is also the texture where a slightly softer, larger bolt tends to look best; the coils naturally fill and blur very fine lines.
Coily Hair Lightning Bolt

Coily / afro-textured hair delivers the highest-contrast bolt of any texture — the dense coils act like a black canvas and the shaved bolt reads almost like it’s been drawn on. This is the texture you see in most of the viral “how did the barber do that” TikToks, because the visual pop is that strong. The only trap is that coily hair grows differently across the head, so the fade around the bolt has to be re-blended more carefully at each touch-up.
Wavy Hair Lightning Design

Wavy hair sits between straight and curly and delivers a softer bolt read than either. It works well with medium-weight bolts and larger geometric variations, but very thin minimalist bolts get lost in the wave pattern. Best paired with a mid or high fade so the bolt is on a shorter, cleaner canvas rather than trying to compete with the natural wave.
Thick Hair Lightning Art

Thick, dense hair is a bolt’s best friend — the surrounding density gives the design a rich, deep frame — but it also means the trimmer needs to go through more hair for a clean edge. On thick hair I always take an extra 10 minutes at the end to detail the bolt edges with a straight razor rather than the trimmer alone, because the density will otherwise leave a slightly furry edge that ruins the design in photos.
Color Enhanced Lightning Designs

Colour-enhanced bolts are the fastest-growing category on my books this year. Most of the growth is coming from bleached highlights inside the bolt path rather than full colour saturation — subtler, less commitment, easier to grow out. Book colour work only with a barber who also colours; a design-only barber sending you across town for the colour is a recipe for a mismatched finish.
Bleached Lightning Bolt Pattern

Bleached bolts leave the bolt path a couple of shades lighter than the surrounding hair rather than shaving to skin. Great option for someone who wants a design that reads in every light but doesn’t want the bare-scalp look of a skin-cut bolt. Requires a bond-repair treatment after bleach and a follow-up toner if you go too warm — the yellowing at week 3 kills the look. Not recommended if your natural hair is very light — the contrast is too weak.
Colored Fill Lightning Design
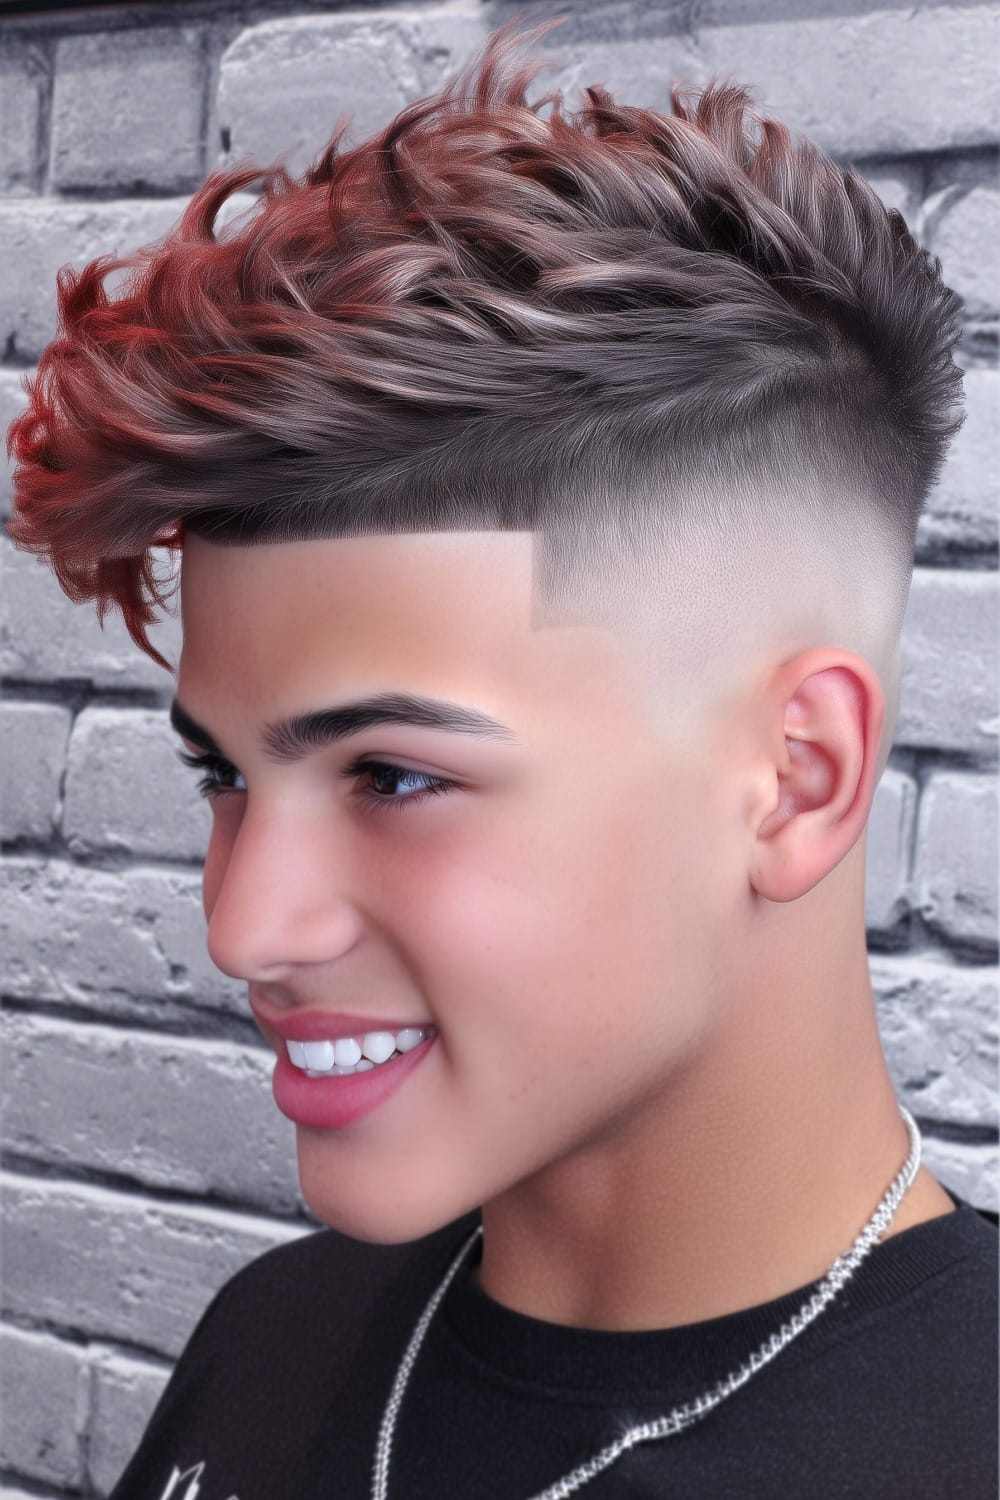
Coloured-fill bolts are the ones going viral — a shaved bolt path with a solid block of colour (red, blue, gold, silver-white) painted or airbrushed into the shaved skin. Semi-permanent hair paint lasts about a week, and the effect for that first week is extraordinary. Best for events, photoshoots, or festival weekends. Ask the barber for a patch test on your inner arm first if you’ve never had colour on scalp before.
Gradient Lightning Bolt Art

Gradient bolts fade from one colour to another along the bolt’s length — usually a red-to-yellow or blue-to-white. Technically demanding and expensive; expect $80-150 on top of the cut. Reads incredibly under studio lighting or at events, less impressively in everyday daylight. Not a daily-wear choice, but a stand-out special-occasion option.
Neon Edge Lightning Pattern

Neon-edge bolts trace a bright fluorescent colour around the outside line of the bolt while keeping the inside shaved to skin — the design reads like it’s outlined in light. Popular for content creators, event photography, TikTok reveal videos. Use a UV-reactive semi-permanent hair paint for maximum impact under stage or club lighting.
Lightning Bolt With Popular Cuts

The bolt is a topping — the haircut is the base. Below are the six haircuts I most often pair with a lightning bolt in 2026, with the exact way I set each one up to make the bolt read.
Buzz Cut Lightning Design

The buzz-cut bolt is my recommended starter — the whole head sits at #1 or #2 all over, and the bolt reads clearly against that flat field with almost no need for a fade blend. Low maintenance, low cost, and the bolt lasts longer against a short-all-over base because there’s no adjacent long hair growing back into the design lines. Perfect summer cut.
Crew Cut With Lightning Bolt

A crew cut with a bolt keeps the top slightly longer (roughly #4-#6, 12-18mm) with faded sides and a bolt on the temple. Cleaner and more grown-up than the buzz version, and my most-requested cut for guys 25+ who want a bolt but don’t want to look like they raided a teen fashion aisle. Ask specifically for the top to be scissor-blended into the fade — a hard clipper line between top and sides doesn’t flatter this look.
Pompadour Lightning Pattern
The pompadour bolt takes a classic mid-century silhouette — long slick top swept back off the forehead — and pairs it with a modern bolt on the shaved side. The contrast is the whole point: heritage on top, current on the side. Use a matte-finish styling paste on the pomp so the top and the bolt live in the same visual weight; a shiny pomp on a matte bolt looks disconnected.
Mohawk With Lightning Art

A mohawk with bolts is the loudest cut in this guide. Faded panels either side of a spiked or braided central strip, each panel carrying its own bolt design. Great for stage performers, festivals, dance competitions — I’ve done this cut on a lot of hip-hop dance-off clients over the years. Not a workplace haircut. Commit or don’t.
Textured Crop Lightning Design

The textured crop with a bolt is the 2026 cut I’m putting on most of my 18-30 clients. Short piece-y top, mid or high skin fade, single bolt on the temple. It photographs beautifully, it works with almost every face shape, and the textured top plays well with the bolt’s sharp angles. If you don’t know what to ask for, ask for this.
Quiff With Lightning Bolt
The quiff-and-bolt keeps the front lifted and swept back, with a lower fade so most of the side stays medium length. Best with a minimalist bolt rather than a bold one — the quiff already carries a lot of visual weight up front and you don’t want the side competing with it. Style with a light-hold cream (not a wax) so the quiff has soft movement.
Size And Scale Options

Bolt scale is the most under-considered decision in the chair. Two clients can ask for “a single bolt on the temple” and walk out with very different haircuts because one asked for micro and the other for oversized. Use the scale ranges below and give your barber a specific number in inches rather than a vague description.
Micro Lightning Bolt Design

Micro bolts are 1-2 inches tall, thin-line width, and often placed behind the ear or on the nape. They’re barely visible from more than five feet away, which is the point. Workplace-safe, school-safe, and the version I recommend to any client testing whether they actually like having a design at all before committing to something bigger.
Medium Lightning Pattern

Medium bolts are 3-4 inches tall, medium-width (4-6mm), and sit in the classic temple placement. This is the size 70% of my clients end up on — big enough to read in photos, small enough not to dominate the haircut. If you’re doing your first bolt and you don’t have a specific reason to go bigger or smaller, this is the sensible default.
Oversized Lightning Art

Oversized bolts run 5-7 inches tall and can be up to an inch wide at the widest. This is a statement piece — visible from across a room, definitely visible in every photo, and instantly readable at any distance. Best on high skin fades with plenty of open canvas. Not a starter piece and not something to fit into a workplace where dress code is enforced.
Full Head Lightning Network

Full-head networks wrap bolts around both sides and the back of the head, connected or independent. This is a portfolio piece: 90 minutes minimum in the chair, requires touch-ups every 10 days, and only really works with buzz-cut or textured-crop top hair to keep visual balance. It looks incredible when it’s fresh and less good than any other design in this guide when it’s not — so only commit if you can commit to the maintenance schedule.
Styling Your Lightning Bolt Cut
How you style the top hair changes how the bolt reads — often more than the bolt itself. Below are the four finishes I use most, and the products I actually reach for in the shop for each one.
Matte Finish Lightning Look
Matte is the finish I recommend to 80% of bolt clients. A matte clay or paste on the top hair keeps the top and the side in the same visual weight, which is what makes the whole cut look intentional rather than a haircut with a novelty on the side. For product, ask for a fibre-based matte clay — think Layrite Cement or American Crew Fibre. Work a pea-sized amount through dry hair, style, don’t touch it again.
Glossy Lightning Style
Glossy pomades work with the bolt when the cut itself is heritage-styled — pompadour, side-part, slick-back. Anything else, and the shine on top makes the matte bolt on the side feel disconnected. If you’re going glossy, use a water-based pomade rather than an oil-based one so you can restyle later in the day without ending up looking greasy in the office.
Natural Texture Lightning Design
Natural-texture styling means letting the top dry with minimal product — a light sea-salt spray, air-dry, maybe a scrunch. Works beautifully with curly and coily hair paired with a bolt, because the natural movement of the top plays with the sharp graphic of the design. Not a look for straight hair — the top needs some real texture for this to work.
Slicked Back Lightning Pattern
Slicking the top hair back completely reveals the temple area, which puts the bolt on full display — the whole point if you want maximum impact. Use a strong-hold water-based pomade, blow-dry the hair straight back before applying, then comb through. This is the styling choice for photo shoots, event nights, or anywhere the bolt is meant to lead the look.
Ready to Find Your Perfect Cut?
You’ve read about the styles. Now find the one that fits YOUR face shape, hair type, and lifestyle.
FAQs
How long does a lightning bolt design last?
A crisp bolt reads sharp for about 10 to 14 days on most guys. After that the surrounding hair grows back into the negative-space channels and the edges start to blur. If you want it to look photo-ready every day, book a 15-minute touch-up every 10 days; if you don’t mind a softer look by week three, you can stretch it to a normal 3-week cycle.
What guard size gives the best contrast for lightning bolt patterns?
For the surrounding fade I keep the deepest point on a #0.5 or bald and step up in half-guards (#0.5, #1, #1.5, #2) so the design has a proper gradient behind it. The bolt itself is cut with the trimmer detailer, not a guarded clipper — I lift the surrounding hair with a #2 (6mm) and etch the bolt down to skin. That 6mm-to-skin drop is what makes the lightning pop in photos.
Can I get a lightning bolt with long hair on top?
Yes — this is the version I recommend to most working professionals. Keep the top 3-6 inches long and only shave the bolt into an undercut panel above the ear or behind the temple. When your hair is down and combed, the design is completely hidden; when you tie it back or push it up in the gym, the bolt reveals itself. It is the safest way to have a design without committing to a full skin fade.
How much does a lightning bolt haircut cost on top of my regular cut?
In a standard shop, expect to pay $10 to $30 extra for a single bolt on top of your regular cut. A double or triple stack usually runs $25 to $45. Full-head networks or colour-fill bolts can push $60 to $120 in a design-focused shop. Always agree the price BEFORE the trimmer touches your hair — a good barber will quote you upfront.
Are lightning bolt haircuts okay for school or work?
It depends on placement, not on whether you have one. A micro bolt behind the ear or inside a fade panel is invisible in most professional settings and passes every school dress code I’ve seen. A bold high-fade bolt across the temple gets attention. If your workplace or school is strict, ask for a hidden-panel design under longer hair on top — you get the cut without the conversation.
Do lightning bolt designs damage the hair?
No. The bolt is cut with a trimmer, not a razor blade — the hair grows straight back at the normal 1.25cm per month. There is no bleach, no chemistry, no scarring of the scalp. The only thing that damages the hair is over-bleaching a coloured-fill bolt without a proper toner and bond-repair aftercare, which is why I only recommend that version if you already dye your hair.
What’s the best age for a lightning bolt haircut?
There isn’t one. I do micro bolts on 6-year-olds heading into a new football season, subtle side bolts on university students, and hidden-panel bolts on 40-year-olds who want a little edge under a corporate haircut. The design scales with the man — the size, boldness, and placement change with age, but the cut itself has no age limit.
Was this article helpful?

Khamis Maiouf is a professional barber who graduated from Hinckley College in England with a Level 3 qualification in hairdressing. With over 20 years of experience, he is an award-winning barber who has mentored numerous students and styled thousands of clients. A recognised expert featured on StyleCraze (20M+ readers).
Credentials: Level 3 Hairdressing (Hinckley College, UK) • 20+ Years Professional Experience • Featured Expert on StyleCraze • Founder of Book of Barbering