✓ Written & Reviewed by Khamis Maiouf — Award-Winning Barber · 20+ Years Experience · Level 3 Qualified
“Can I get a buzz cut without clippers?” I hear this question more often than you’d think — usually from guys travelling, camping, or just trying to avoid buying a proper set. The short answer is: sort of.
The longer answer involves knowing which alternatives actually produce a passable result and which ones will leave you looking like you lost a fight with a lawnmower. I’ve used every tool in the book over 20 years. Here’s what works, what kind of works, and what you should never attempt.
Key Takeaways
Not sure which style suits you best? Our Haircut Finder Quiz matches you with the right cut based on your face shape and hair type — takes 60 seconds.
Scissors with a comb can achieve a short crop but not a true uniform buzz — it’s a different look
Manual (non-electric) clippers exist but require skill and patience most people don’t have
Body trimmers and beard trimmers can work in a pinch but leave a less uniform finish
The “scissor over comb” technique is legitimate but requires practice to avoid choppy results
If you’re serious about buzz cuts long-term, investing in proper clippers pays for itself after two uses
Creating a buzz cut without clippers requires mastering three fundamental elements. Your scissors become the primary tool, replacing the efficiency of electric clippers with manual precision.
The key lies in maintaining consistent finger placement throughout the entire cutting process. This manual approach takes patience but delivers surprisingly professional results.
Time requirement: Expect 45-60 minutes for your first attempt
Skill level: Basic scissor handling plus steady hands
Sharp haircutting scissors minimum 5 inches long
Comb with fine teeth for precise sectioning
Scissors-Only Technique
The scissors-over-comb method forms your foundation for achieving buzz cut length. Position the comb flat against your scalp, lifting hair perpendicular to create uniform cutting lines.
Cut in small, controlled snips rather than long strokes. This prevents accidentally removing too much length while maintaining better control over the final result.
Guard Alternatives
A fine-tooth comb serves as your makeshift guard when creating consistent length. Place the comb teeth directly against your scalp, using the spine as your cutting guide.
Tape markers on your comb create precise length measurements. Mark 1/4 inch, 1/2 inch, and 3/4 inch intervals for different buzz cut variations.
🎯 Precision Points
Focus on crown areas first where mistakes are most visible. Work systematically from front to back, checking each section against previously cut areas.
The temples and neckline require extra attention for clean lines. Use point cutting techniques here rather than straight across cuts for natural blending.
🧠 Expert Advice
Keep a spray bottle handy to dampen hair every 10 minutes during cutting. Wet hair shows length inconsistencies better than dry hair, making it easier to spot uneven areas before they become permanent mistakes you’ll regret.
Home Buzz Cut Without Clippers Setup
Your workspace determines the quality of your clipperless buzz cut. Proper setup eliminates guesswork and reduces the risk of uneven results or missed spots.
Natural lighting beats bathroom lighting for seeing true hair length. Position yourself near a window during daylight hours for the most accurate visibility.
Required Tools
Professional haircutting scissors make the biggest difference in your final result. Invest in sharp, stainless steel scissors specifically designed for hair rather than using household scissors.
A hand mirror becomes essential for checking blind spots. Choose one with a handle for easier maneuvering around your head’s curves.
Mirror Positioning
Set up a three-way mirror system using your bathroom mirror plus two hand mirrors. This configuration lets you see every angle without straining your neck or arms.
Mount or prop mirrors at eye level to maintain proper posture. Poor positioning leads to fatigue and cutting mistakes in hard-to-reach areas.
Workspace Preparation
Lay newspaper or a drop cloth covering at least four feet around your cutting area. Hair travels further than you expect when cutting without clippers‘ suction.
Keep all tools within arm’s reach on a clean towel. Organization prevents you from searching mid-cut with hair-covered hands.
⚠️ Common Mistake
Starting without properlighting setup causes most uneven buzz cuts. You’ll miss patches in shadows, creating a patchy appearance that requires professional correction or waiting weeks for hair to grow back evenly.
Cutting Buzz Without Clippers Method
The systematic approach to scissor buzzing follows a specific pattern for consistency. Start with longer lengths, then gradually reduce to your target buzz cut measurement.
Work in quadrants rather than random sections for better control. This methodical process ensures you don’t miss spots or create length variations.
“The difference between a good scissor buzz and a bad one is patience – rush the process and you’ll wear a hat for weeks.”
Sectioning Strategy
Divide your head into six main sections using ear-to-ear and center partings. This creates manageable zones that you can complete one at a time.
Pin or clip completed sections to avoid re-cutting the same area. Double cutting causes unwanted shorter spots that ruin the uniform buzz appearance.
Length Control Without Clippers
Your fingers become the guard system when cutting without clippers. Maintain consistent finger width between scalp and cutting line throughout the entire process.
Use a ruler initially to measure your finger placement accuracy. Most people’s index finger width equals approximately 3/4 inch, perfect for medium buzz length.
✂️ Cutting Angles
Hold scissors parallel to your head’s curve rather than perpendicular. This angle creates a softer, more natural-looking buzz cut edge without harsh lines.
Rotate your wrist slightly for each snip to follow head contours. Straight cutting creates flat spots that look unnatural in overhead lighting.
Even Buzz Cut Without Clippers
Achieving uniformity without clippers demands constant checking and adjusting. Run your hands over cut sections feeling for length variations every few minutes.
The texture test reveals more than visual inspection alone. Your fingers detect subtle differences that eyes miss, especially in back areas.
Checking Consistency
Use the comb-lift test across all sections to verify even length. Lift hair straightup with your comb, checking that all strands reach the same height.
Take phone photos from multiple angles between sections. Photos reveal unevenness your eyes adapt to and ignore during the cutting process.
Blending Without Clippers
Point cutting creates seamless transitions between sections without clipper blending. Angle scissors vertically, making tiny snips to soften any visible lines.
The twist-and-cut method helps blend stubborn demarcation lines. Twist small sections before cutting to create natural graduation between lengths.
Problem Areas
The crown swirl challenges even experienced home barbers cutting without clippers. Cut this area last when you understand your hair’s growth pattern.
Behind the ears needs extra attention for symmetry. Use your fingers as guides, measuring equal distances from each ear.
🧠 Expert Advice
Cut your buzz 1/8 inch longer than desired, then refine after sleeping on it. Fresh eyes the next morning reveal spots you missed, and having extra length gives you room to perfect the cut.
Back and Sides Without Clippers
The back of your head presents the biggest challenge when buzzing without clippers. You’re working blind, relying on mirrors and touch to guide your scissors.
Systematic coverage prevents the patchy results common in DIY buzz cuts. Move methodically rather than jumping between random sections.
Mirror Technique
Hold your hand mirror at 45 degrees to see the back reflected in your main mirror. This angle provides the clearest view while keeping your cutting hand free.
Switch hands when cutting opposite sides for better control. Ambidextrous cutting takes practice but delivers more even results than awkward reaching.
⚠️ Common Mistakes
Rushing the neckline creates an uneven bottom edge that’s visible to everyone behind you. Slow down here, using horizontal sections and checking repeatedly in mirrors before moving up.
Many people cut their sides too short compared to the top. Maintain the same finger-width guide throughout to avoid this classic DIY mistake.
Partner Assistance
A trusted helper handles the back section in half the time. Guide them using specific finger-width measurements rather than vague descriptions like “shorter” or “blend it”.
Teach your assistant the comb-and-cut technique before starting. Practice on a small test section first to ensure they understand your desired length.
Not sure what your face shape is? Our Face Shape Detector figures it out in 4 quick questions.
⚠️ Common Mistake
Attempting the back section when your arms are tired leads to disaster. Take a 10-minute break after completing the top and sides, stretching your shoulders and wrists before tackling blind areas.
Buzz Without Clippers Timeline
Your first scissor buzz takes significantly longer than subsequent attempts. Budget two hours initially, including setup, cutting, and cleanup time for realistic expectations.
Speed improves dramatically after three or four DIY sessions. Most people reduce their time by half once muscle memory develops.
First Attempt Reality
Expect to spend 60-90 minutes on actual cutting during your initial attempt. Add another 30 minutes for corrections and touch-ups after discovering uneven spots.
The learning curve feels steep but plateaus quickly. Your second attempt typically takes 30% less time with noticeably better results.
⏱️ Time Investment
Professional barbers complete buzz cuts in 15 minutes using clippers. Your scissor method requires 45-60 minutes even with experience, but saves money long-term.
Morning sessions work better than evening attempts. Fresh concentration and natural light combine for faster, more accurate cutting.
Skill Development
Hand positioning becomes automatic after four or five scissor buzz cuts. Your fingers naturally find the right spacing without conscious measurement.
Mirror coordination improves faster than cutting technique. Most people master the three-mirror system within two sessions but need more practice for consistent length.
Emergency Fixes Without Clippers
Mistakes happen even with careful technique, but most are fixable without starting over. The key is addressing problems immediately before your hair settles into the new length.
Keep your scissors sharp throughout the fix process. Dull blades cause more problems when trying to correct existing issues.
Patch discovery: Spray water to lift hair and reveal hidden long spots
Line softening: Use thinning shears for harsh demarcation marks
Texturizing powder helps disguise minor length variations
Strategic styling products can temporarily mask problem areas
Uneven Spot Solutions
Small long patches blend away using the point-cutting technique around their edges. Work in a circular motion, gradually feathering the length difference until invisible.
Large uneven areas require lowering the entire section’s length. Better to go slightly shorter overall than leave obvious patches.
Length Corrections
When one side appears longer, resist immediately cutting it shorter. First verify using measurements since optical illusions occur with head shapes and lighting.
Gradual reduction prevents overcompensation mistakes. Remove 1/8 inch at a time, checking between each pass rather than aggressively matching lengths.
Realistic Expectations: What Each Method Actually Achieves
Let me set expectations clearly, because “buzz cut without clippers” covers a range of methods that produce very different results.
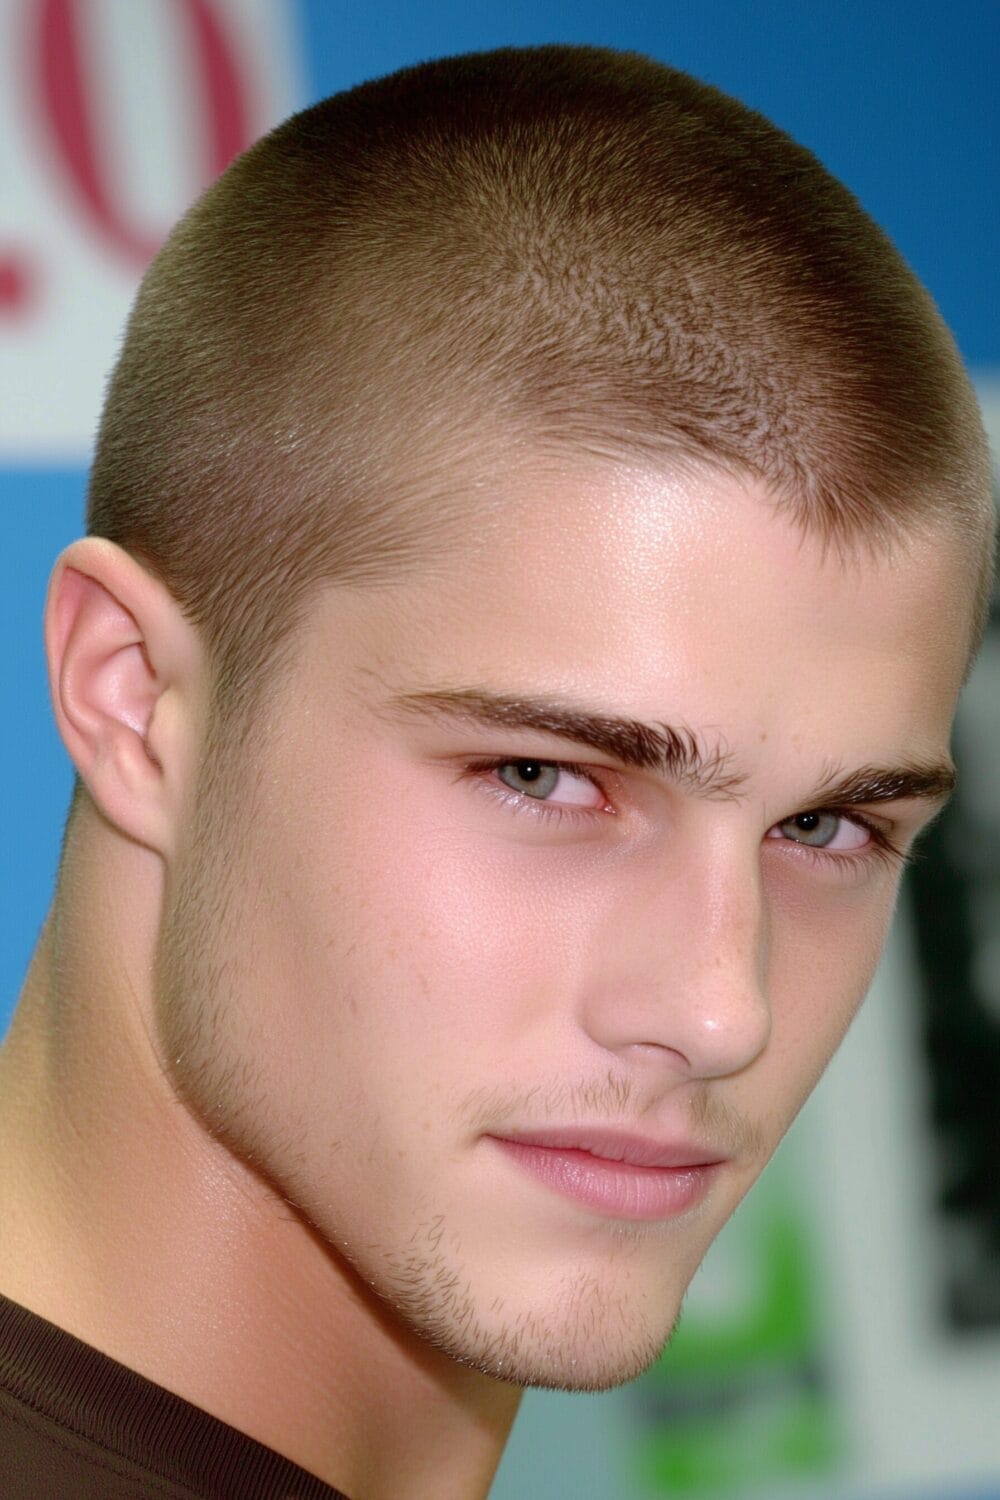
Scissors with a comb: You can achieve a short, even crop (roughly equivalent to a number 6–8 guard) but never a true buzz cut. The result is closer to a short back and sides than a uniform buzz. It takes 3–4 times longer than clippers and requires genuine skill to keep even.
Manual (hand-powered) clippers: These exist and they work, but they’re slow, tiring, and produce a less consistent cut. They were standard before electric clippers existed, and some travelling barbers still carry them as backup. If you’re camping or have no electricity, they’ll do the job — just expect it to take 30+ minutes instead of 10.
Body or beard trimmers: A beard trimmer can technically buzz your head, but the blades are narrower and the motor is weaker. You’ll need to make 3–4 times more passes, and the result will be less uniform. It works in an emergency, but it’s not a long-term solution.
The honest bottom line: if you want regular buzz cuts, invest in proper clippers. Everything else is a workaround, not a replacement.
Ready to Find Your Perfect Cut?
You’ve read about the styles. Now find the one that fits YOUR face shape, hair type, and lifestyle.
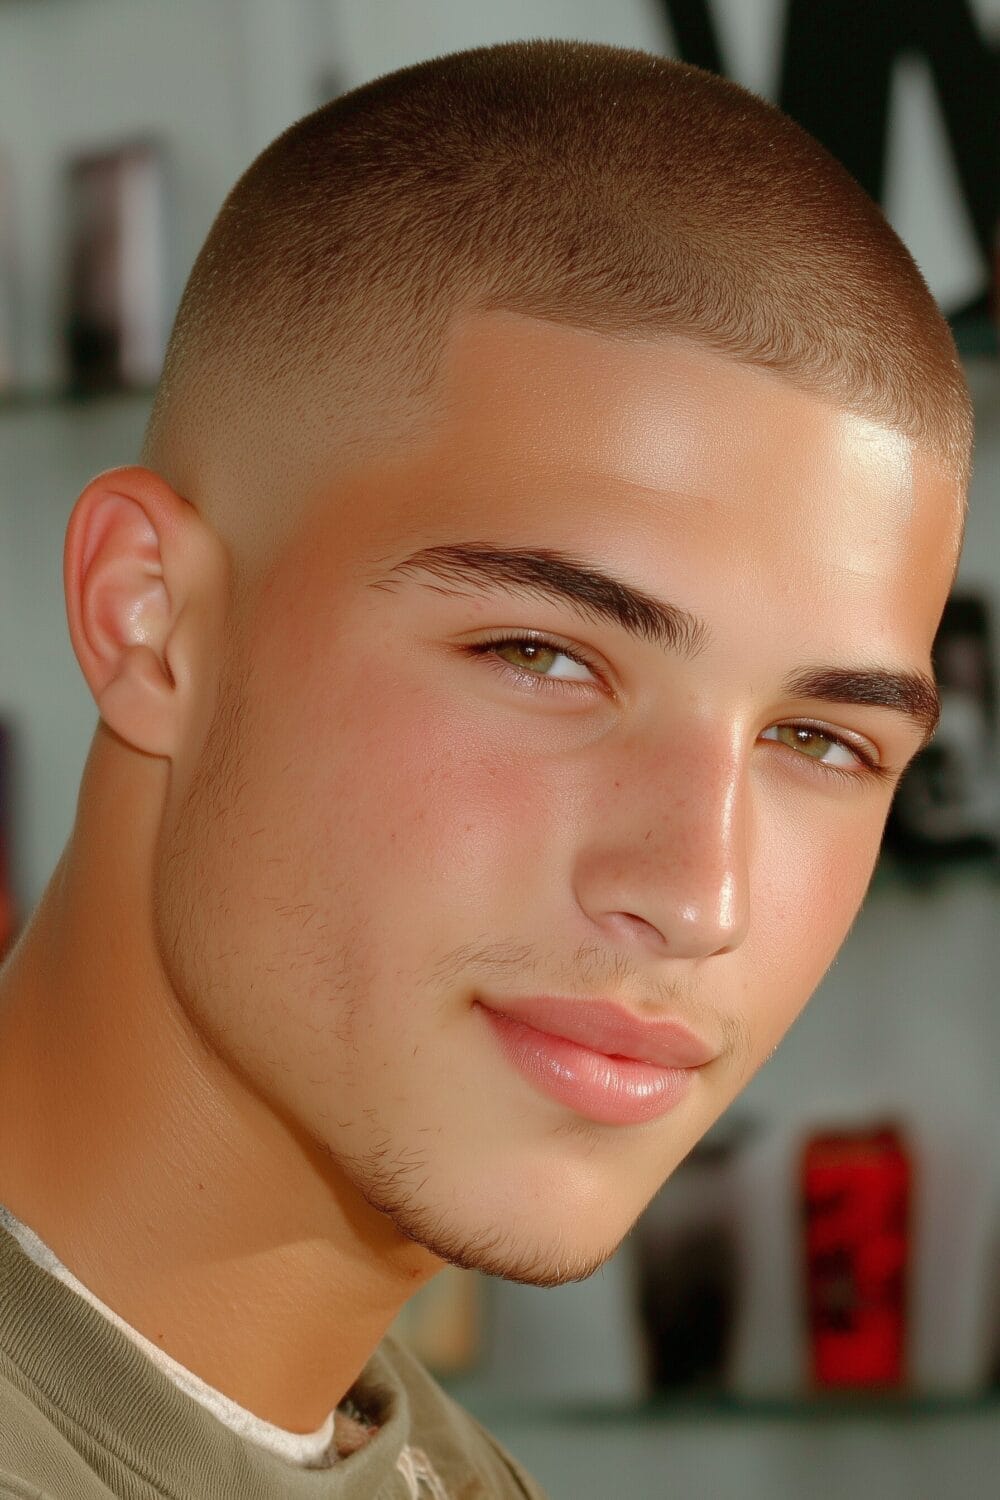
Yes, scissors can achieve buzz cut lengths using the comb-and-cut technique. Results take longer but work when clippers aren’t available or during power outages.
The final appearance matches clipper cuts when done correctly. Most people can’t tell the difference once you master the technique.
How long does buzz without clippers take?
First attempts require 60-90 minutes of cutting time plus preparation. Experienced DIY barbers complete the process in 45 minutes with practice and proper technique.
Factor in extra time for checking and corrections. Rushing guarantees mistakes that take longer to fix than working methodically from the start.
Best scissors for buzz without clippers?
Professional haircutting scissors between 5.5 and 6.5 inches work best. The length provides control while the sharp blades cut cleanly without pulling or bending hair.
Avoid kitchen or craft scissors that damage hair and create uneven cuts. Investing $30-50 in proper shears saves frustration and delivers better results.
Is buzz without clippers worth trying?
The skill proves valuable during emergencies or when traveling without clippers. Learning the technique also improves your understanding of hair cutting fundamentals.
Cost savings add up for frequent buzz cut wearers. The initial time investment pays off through free maintenance cuts and scheduling flexibility.
Khamis Maiouf is a professional barber who graduated from Hinckley College in England with a Level 3 qualification in hairdressing. With over 20 years of experience, he is an award-winning barber who has mentored numerous students and styled thousands of clients. A recognised expert featured on StyleCraze (20M+ readers).
Credentials: Level 3 Hairdressing (Hinckley College, UK) • 20+ Years Professional Experience • Featured Expert on StyleCraze • Founder of Book of Barbering